- The Mac Print App is the most flexible way to print from a Mac.
- Print from any software by choosing File>Print and selecting a wēpa printer.
- If you want to deploy this to multiple public computers, click here.
Quick Start: Download this and run it.
See below for information on the following topics:
- Website Download
- Installation
- Lab / Public Options
- How to Print
- Guest Printing
- Setting Default Printer
- Uninstalling
WEBSITE DOWNLOAD
Go to wepanow.com/software to download the latest version. Latest Version 2024.8.19
INSTALLATION (VERSION 6)
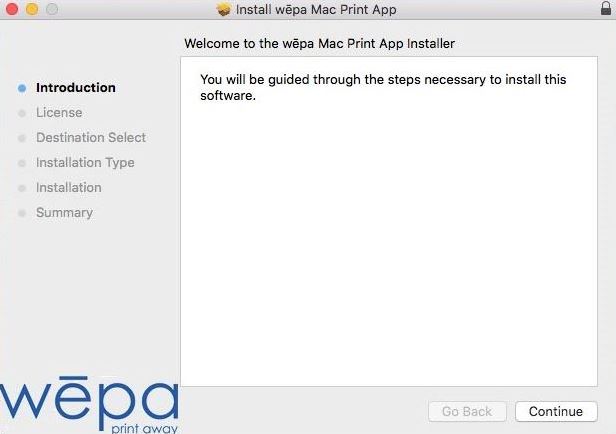
- Open the .pkg file to begin installation. If Gatekeeper is set only to allow from the Mac App Store, right click or control click the .pkg installer to bring up the context menu, select Open, then click Open on the warning dialog.
- Press “Continue” and proceed through the installation steps.
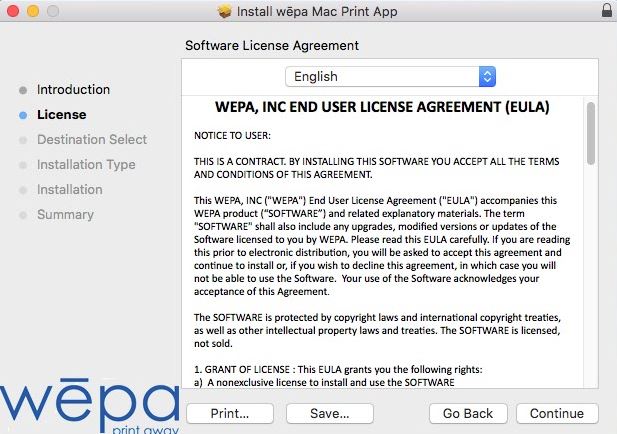
- Choose Continue and accept the terms of the license agreement.
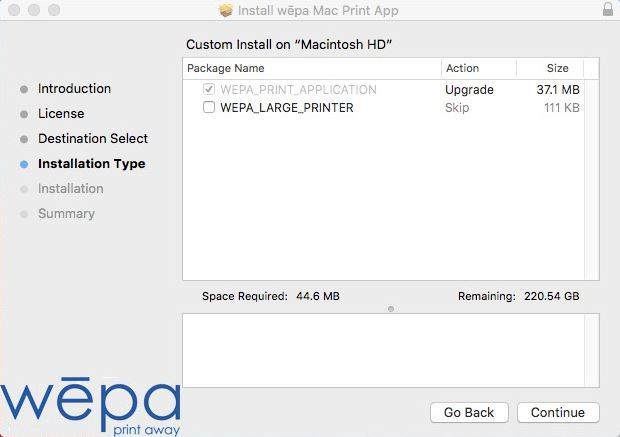
- The mac wepa print app will automatically be checked. Choose continue to proceed in the installation process. Check the box to install the Large Format printer. Large Format printing is not available in all locations.
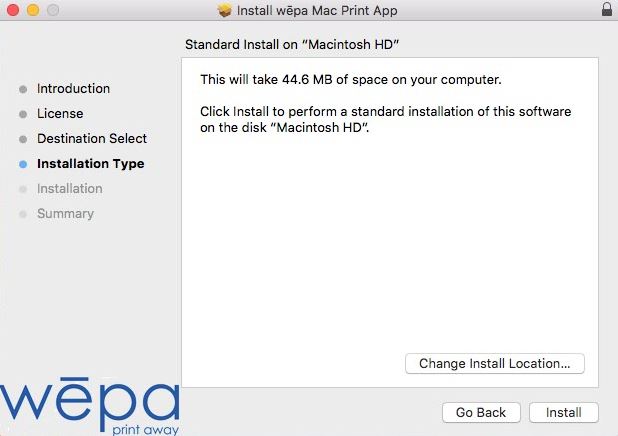
- Select Install to proceed with the installation process.
When the application launches…
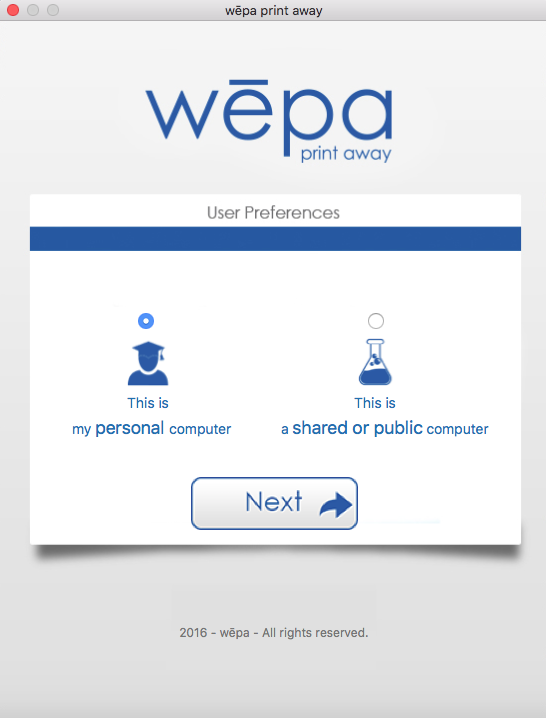
- Select ‘Student’ if installing on a personal computer or ‘Lab’ if installing on a shared or public computer. Click ‘Next’ to Proceed.
Important Note: If you choose Lab, this choice become locked and it is not possible to change to the Student version. You must uninstall and re-install if you decide you want the Student version.
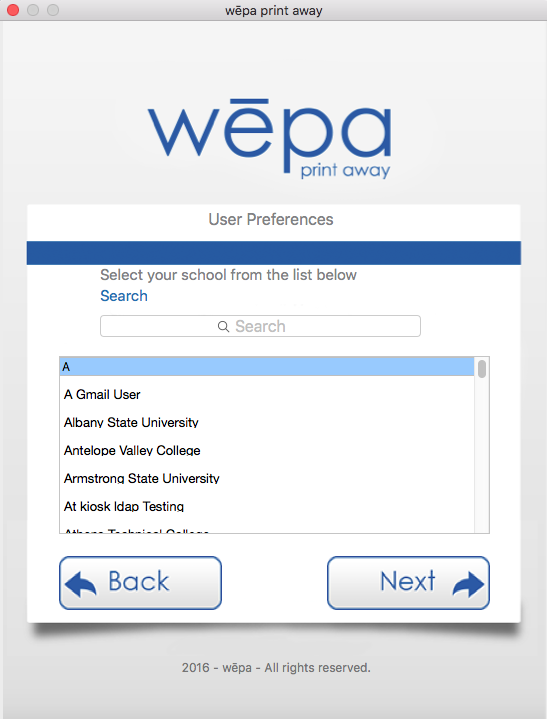
- Select your school or institution. If you are not affiliated with one, choose A Guest User.
If you are installing the Student version you can log in now.
LAB / PUBLIC OPTIONS
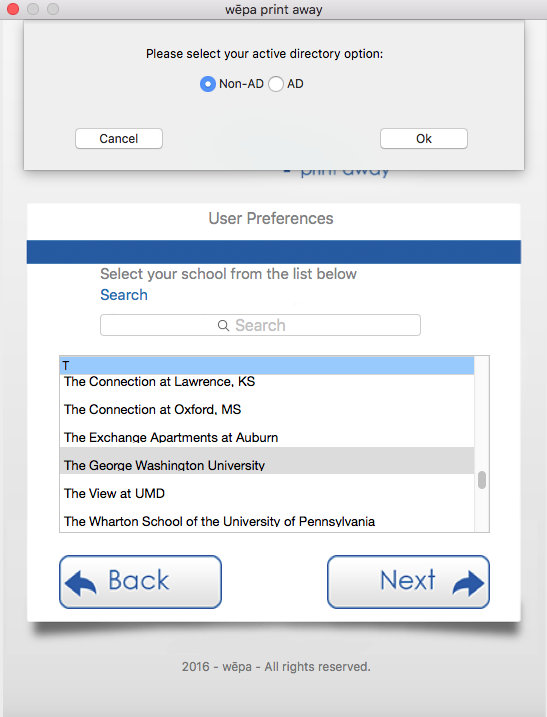
Select your school and proceed by selecting Next. If the active directory option window appears, select whether to use machine credentials for AD login. This option is only available at locations where we are integrated with AD. If you are not sure whether you can use this, ask your wepa Project Manager.
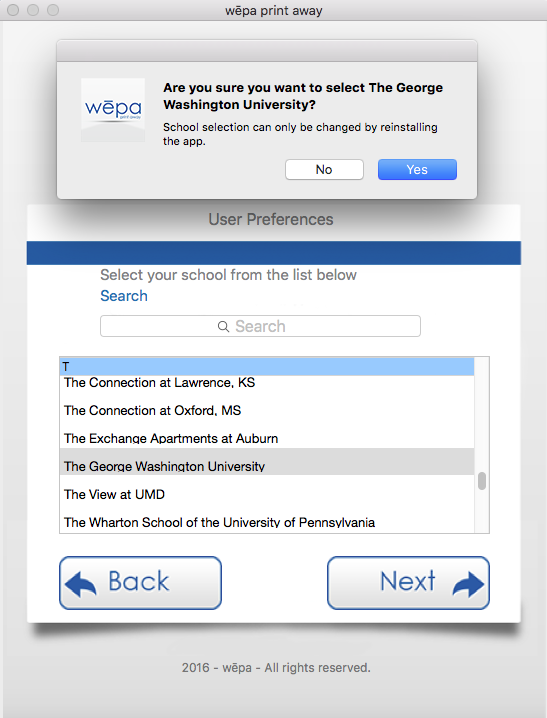
- After you choose the school, you are notified that this choice can only be changed by uninstalling and reinstalling the application.
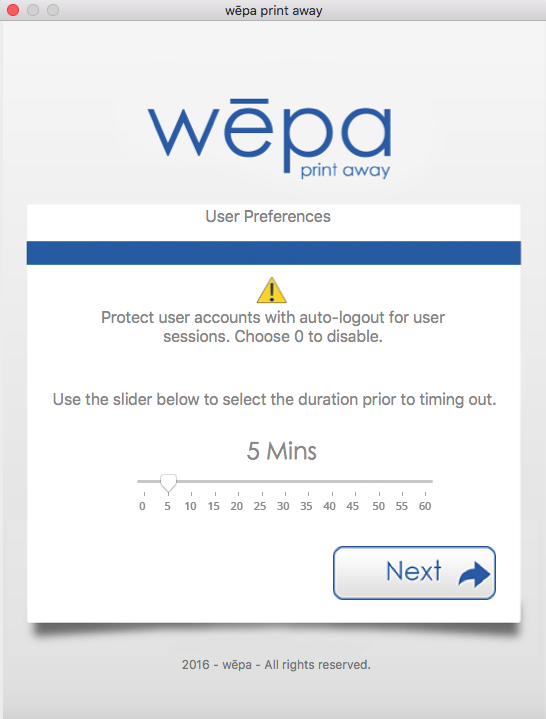
- Set a session timeout value where all users will automatically be logged out of the application after a set amount of time. Set the value to 0 to disable the session timeout.
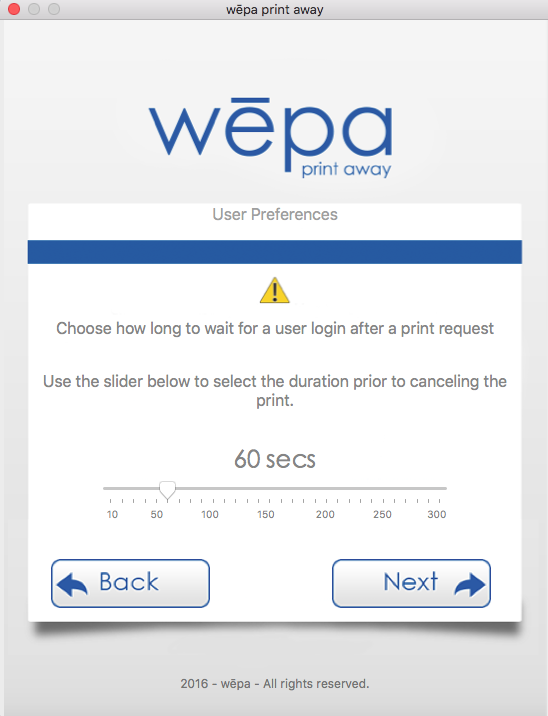
- Choose how long to wait for a user to login after a print request. If there is no login, the print attempt will be canceled after this amount of time.
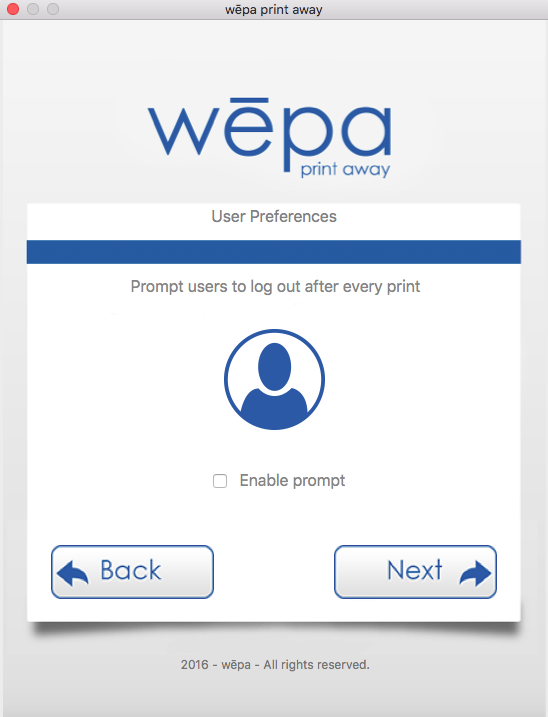
- Choose whether to prompt users to log out after every print. This choice is appropriate when users do not log in and out of Mac with their own account.
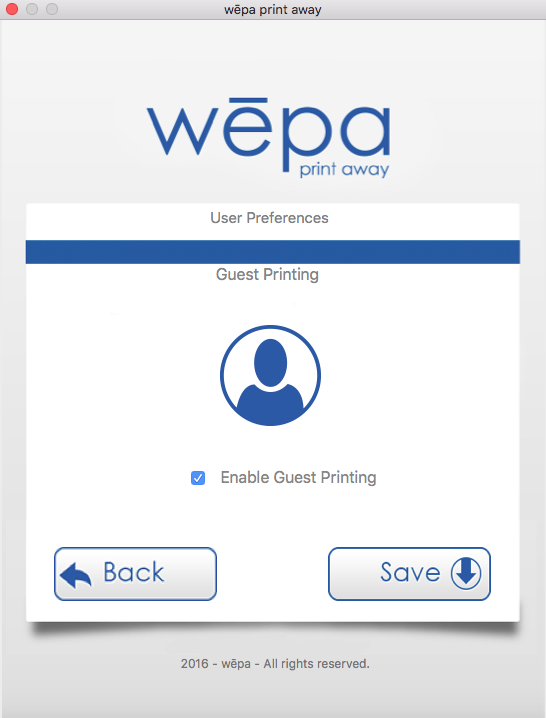
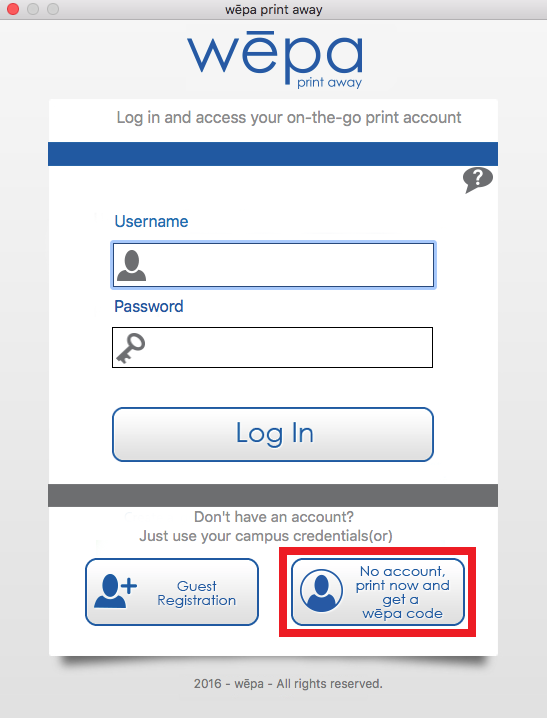
- Select whether the Guest Printing option is available. This option enables the “No account, print now and get a wepa code” button on the login screen. Users can click that button to upload document to a Guest Account and receive a six character wēpa code that can be used at any print station, instead of using a registered account.
Reminder: These choices become locked and it is not possible to change them. You must uninstall and re-install to choose a different school or options.
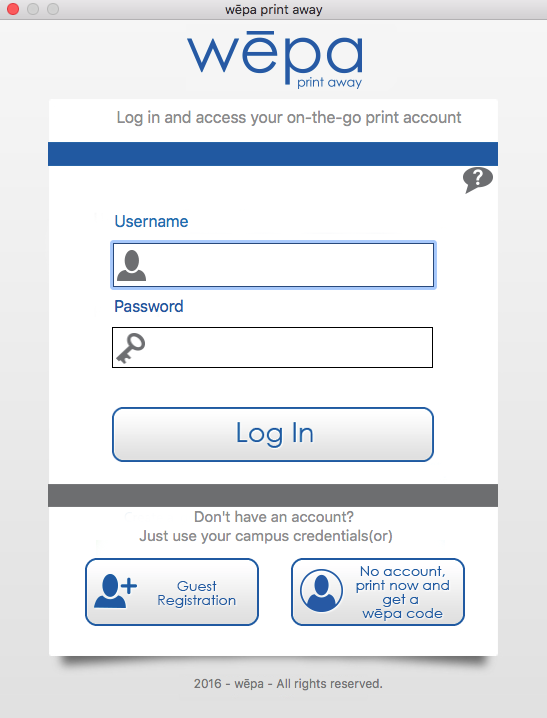
- Choose Save to finish the setup process. A login screen will automatically appear requesting a Username and Password. If Guest Printing is enabled, the lower right button, ‘No account, print now and get a wēpa code’, will be available.
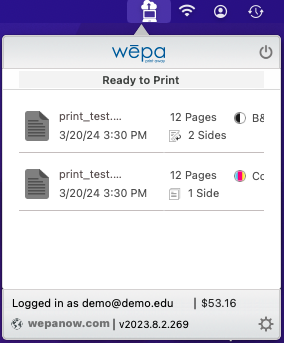
- wēpa icon will appear in the top right MenuBar indicating the wēpa account logged into, Mac Print App version, and list of print jobs.
HOW TO PRINT
From any software that can print, choose File>Print, select a wēpa printer from the drop down menu, and Print. If you are not already signed in, a login prompt will appear.
- The printer icon will appear in lower Mac toolbar indicating the document is being processed. When it disappears, a notification window will appear in the top right MenuBar near the wēpa icon indicating the document is uploading/uploaded.
- Click the wēpa icon to see documents and codes. Remember to just log in at the print station to see all of your documents – you do not have to use the codes if you have an account.
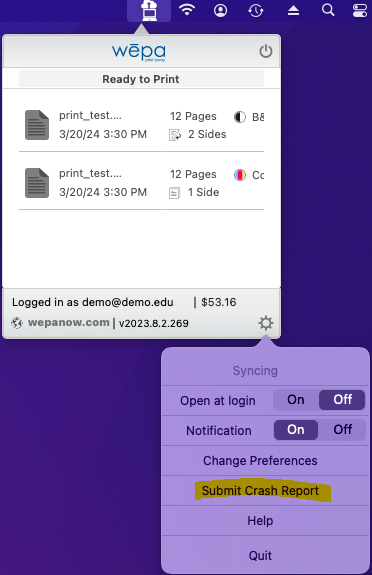
- Click the cog in the lower right corner for settings. Click ‘Submit Crash Report’ to email necessary logs to wēpa support if having issues uploading a document. If it is grayed out, the select here to manually retrieving these logs.
- Click ‘Got Feedback?’ to provide input on how to continue improving the Mac Print App.
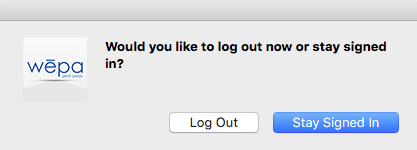
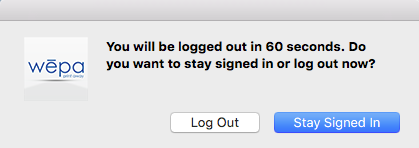
Lab Only: If prompt to logout after every print is enabled, a window will appear requesting the user to ‘Stay signed in’ or ‘Logout’ after each upload. Select ‘Logout’ if finished printing to ensure the next user will not print to your wepa account, or select ‘Stay signed in’ if continuing to print.
Lab Only: If the session timeout is enabled, a window will appear requesting the user to ‘Stay signed in’ or ‘Logout’ after the configured amount of time has passed without a print. Select ‘Logout’ if finished printing to ensure the next user will not print to your wepa account, or select ‘Stay signed in’ if continuing to print.
GUEST PRINTING
If the Guest Printing option was enabled during setup, an option will be available on the Username / Password login screen.
- Choose File>Print and select a wēpa printer. Then choose ‘Print’ in the lower right corner.
- When the login window appears, choose ‘No account, print now and get a wēpa code’.
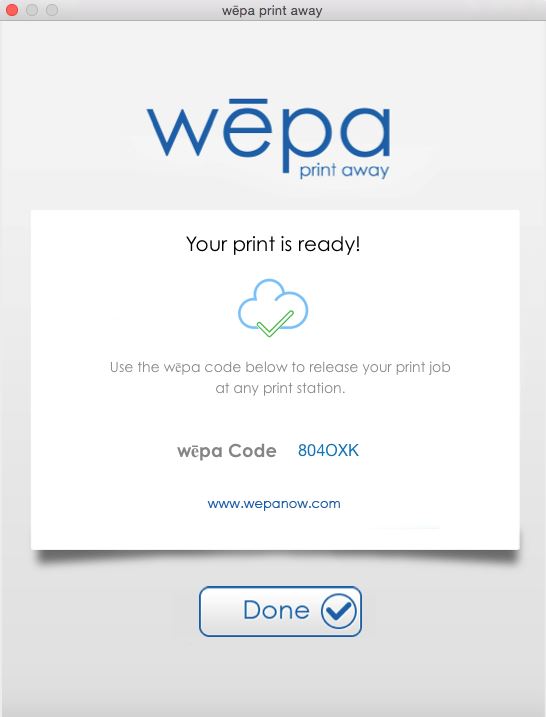
- The Guest Printing window will process and upload the document providing a wēpa codes to use at any print station.
SETTING DEFAULT PRINTER
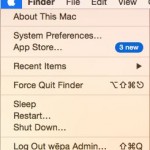
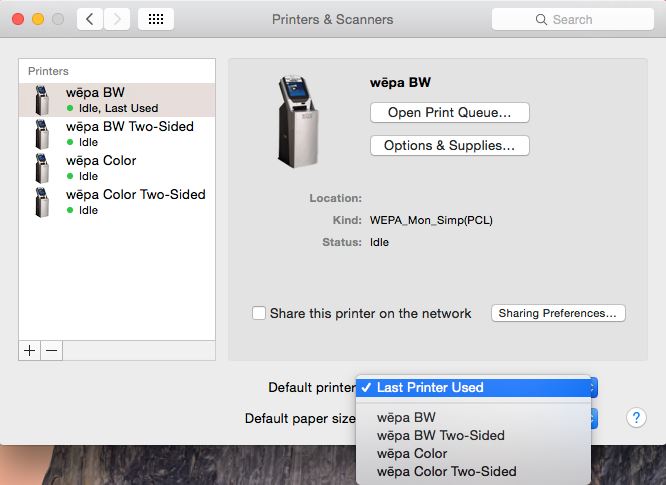
To set the default printer, click the Apple icon in the top right MenuBar, then select ‘System Preferences’, followed by ‘Printers & Scanners’ (below).
- The default printer will be set to the option previously set before installing the Mac Print App. ‘Last Printer Used’ can cause issues, especially for Public / Lab environments with multiple users.
- Select the drop down menu for ‘Default printer’ and select a wēpa printer so that each time a document is printed the wēpa printer will automatically be selected.
UNINSTALLING
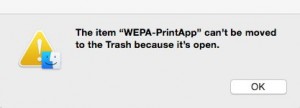
The wepa folders will need to be dragged to the trashcan from the ‘Applications’ folder and ‘Library’ folder. Select ‘Go’ in the top left MenuBar and select ‘Applications’ to open the Applications folder. Drag the wepa folder and icon to the ‘Trashcan’. If the following message appears, the Mac Print App will need to be closed. Click the wēpa icon in the top right MenuBar, then the cog in the lower right window, to click ‘Quit’ and close the Mac Print App.
Next, select ‘Go’ in the top left MenuBar then ‘Go to Folder’. Type ‘~/Library/Application Support’ and drag the ‘Wepa’ folder to the Trashcan. This will uninstall the mac wepa print app.

