Guest and visitor printing is meant for users that do not have an account set up with wepa. The following support article covers guest and visitor printing using the following print methods:
Email-To-Print
Wepa Print Driver
Cloud/USB Print Directly at Print Station
Click here for guest/visitor payment options: Payment Methods.
Email-To-Print
- Email is a good option for a visitor or guest who is on their own device. When we don’t recognize the sender, we will process the attached files and provide one or more ‘Wepa Codes’ to release the files at a print station.
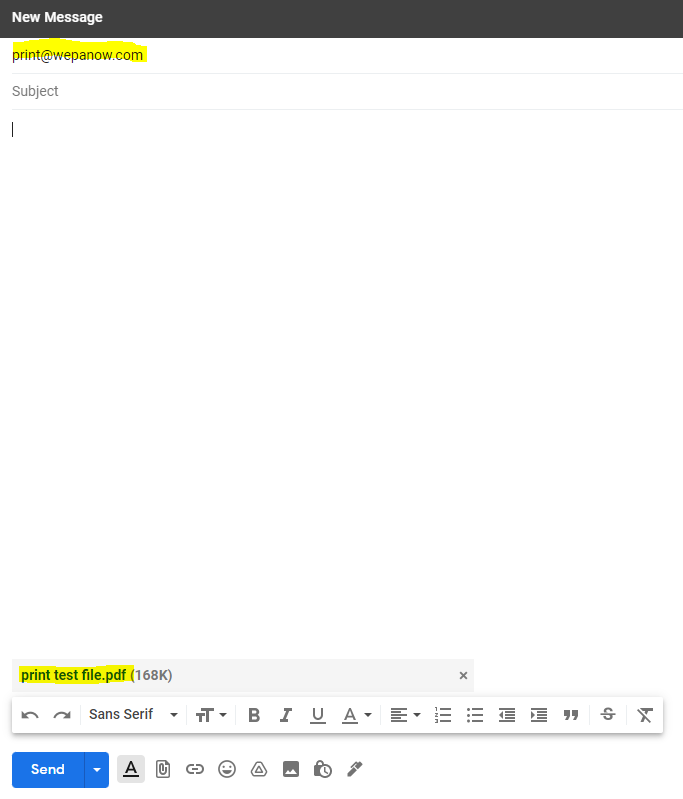
- Open an email client and enter print@wepanow.com in the ‘To:’ field
- Attach a supported file type to the email.
- Optionally, set options like “Color” or “Duplex” in the email body. Refer to the Email-To-Print support article for more details about how to set print options by email.
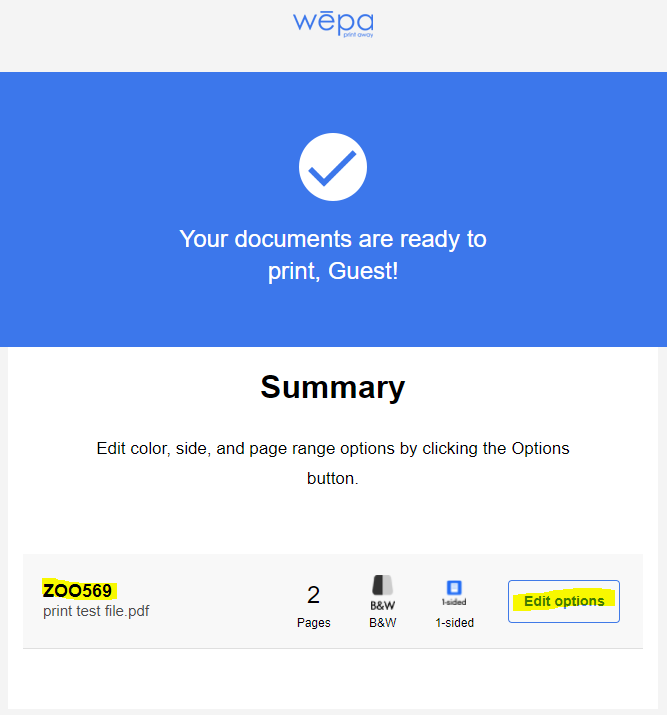
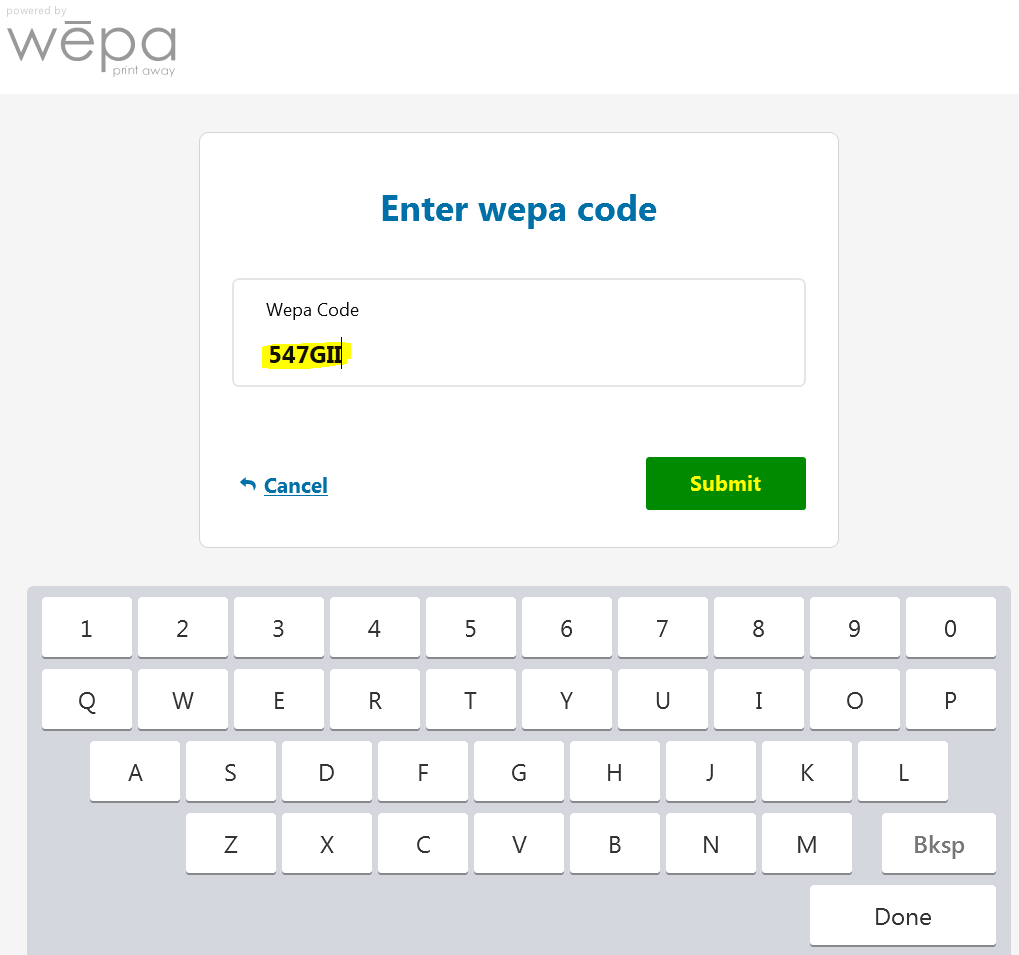
- An email reply should appear shortly in the Inbox with the status of the upload attempt. If successful, a ‘Wepa Code’ will be available like below. Click the ‘Edit Options’ on the right to change the print settings:

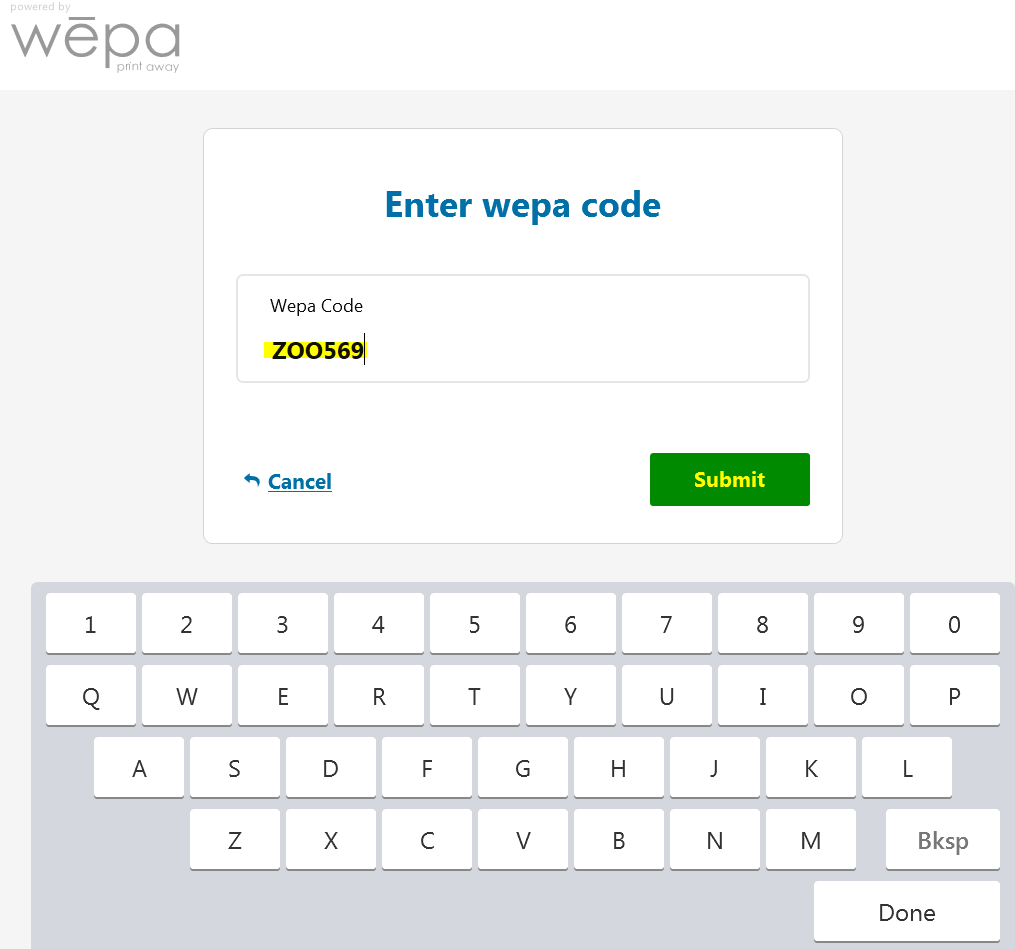
- At the Wepa print station, select the ‘Don’t Have A Card’ button at the bottom and then ‘I Have A Wepa Code’. Enter the 6 alpha-numeric Wepa Code and then ‘Submit’:
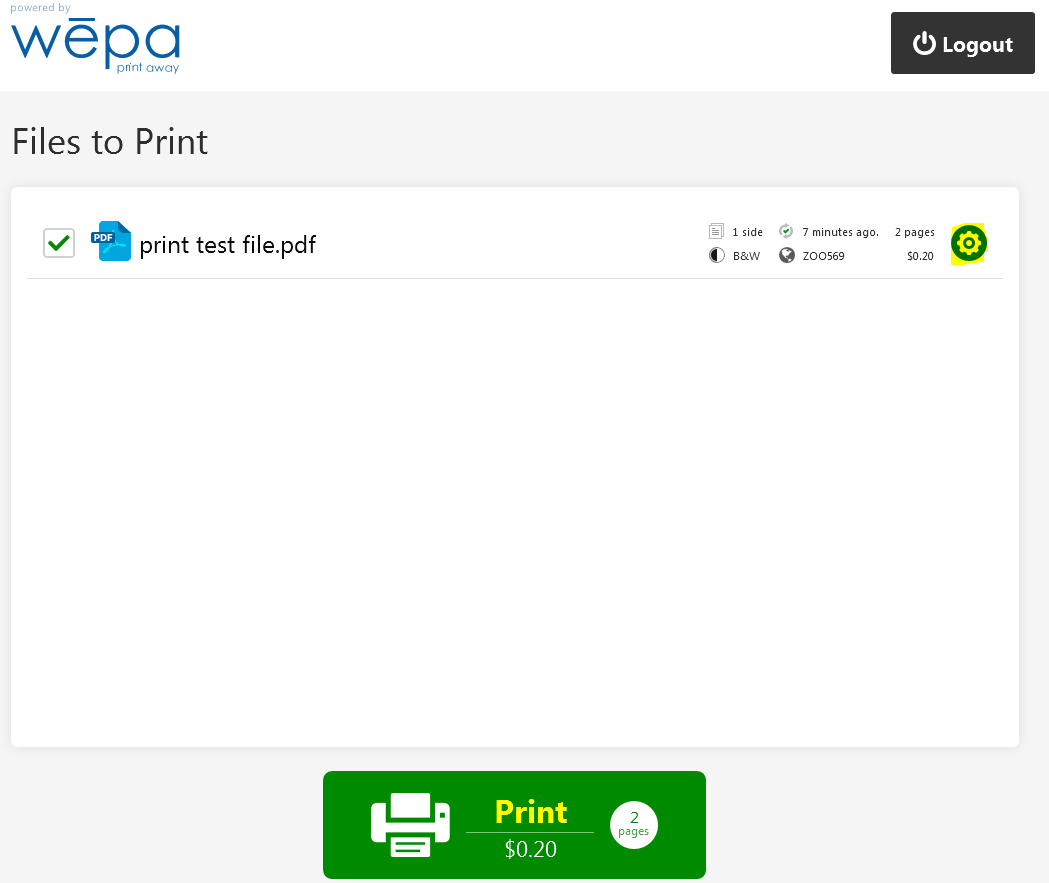
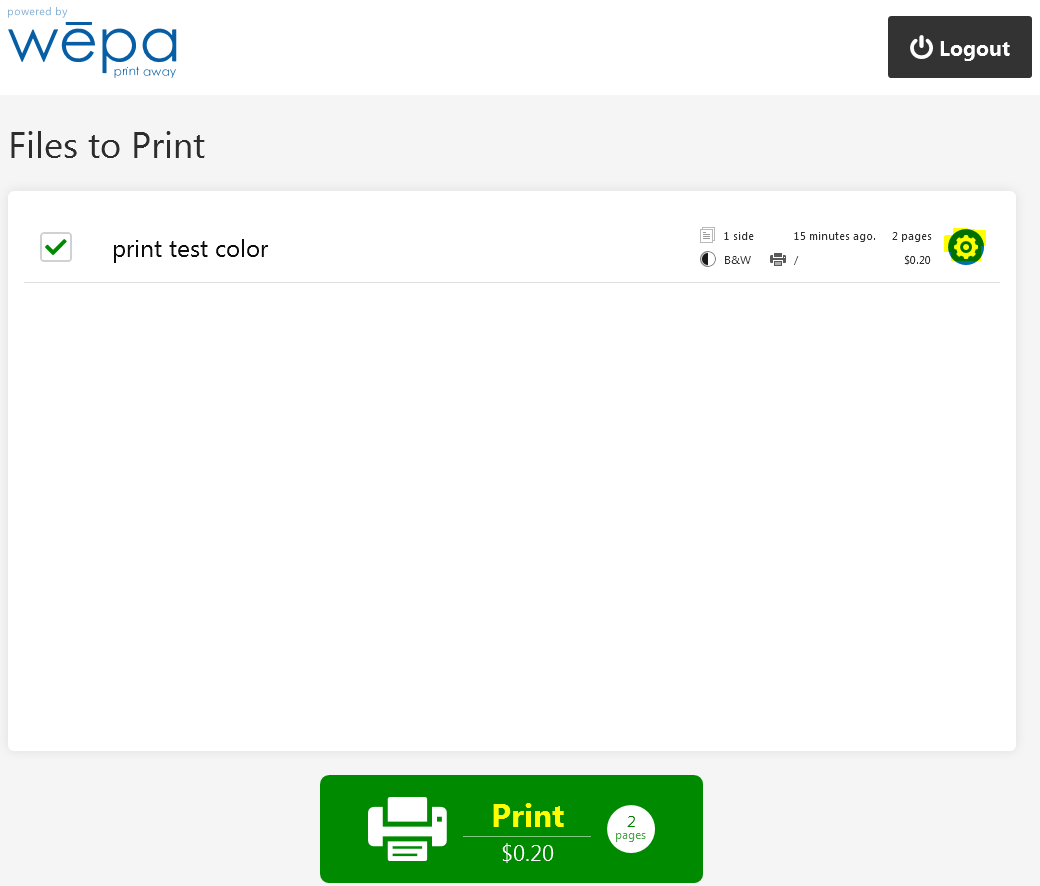
- The uploaded file will appear. Select the cog settings icon on the right to adjust the print settings if needed. Select ‘Print’ at the bottom when ready to proceed to the payment view:
Wepa Print Driver
- The Wepa Print Driver is a desktop client installed on school lab or library computers to upload files. One option is to have a Guest Print button.
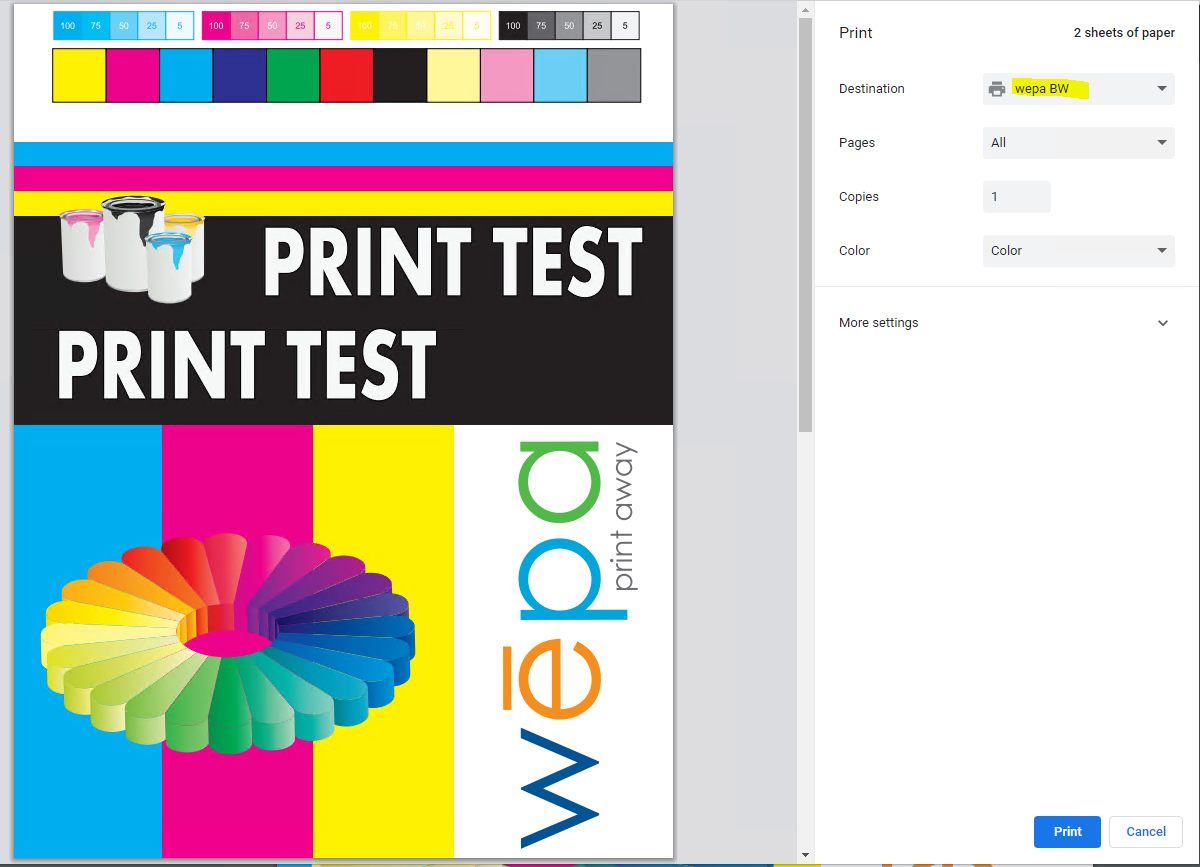
- Open any application and select ‘File>Print’
- Select a Wepa printer from the Printer or Destination dropdown menu. The wepa BW and wepa Color will upload the file as black & white for BW and color for Color. The wepa 2-sided printers will upload the file as double-sided. Select Print to proceed with sending the file to the Wepa Print Driver desktop client:
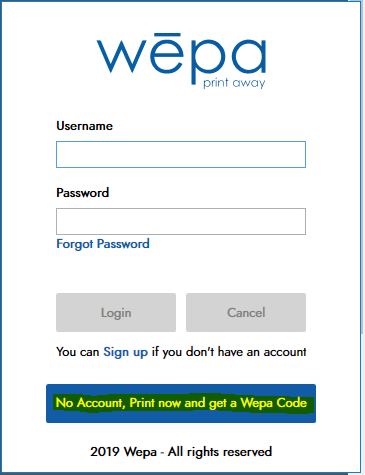
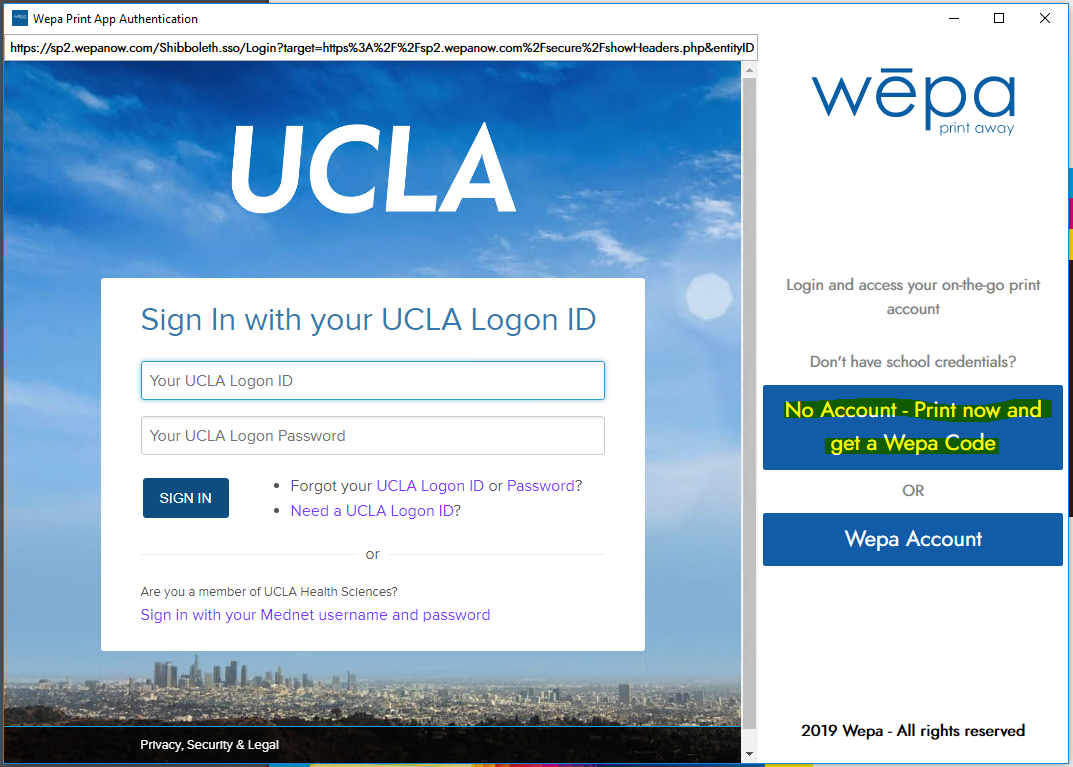
- The Wepa Print Driver desktop client will launch (appearance may vary by location). Select the blue button ‘No Account, Print Now and get a Wepa Code’:
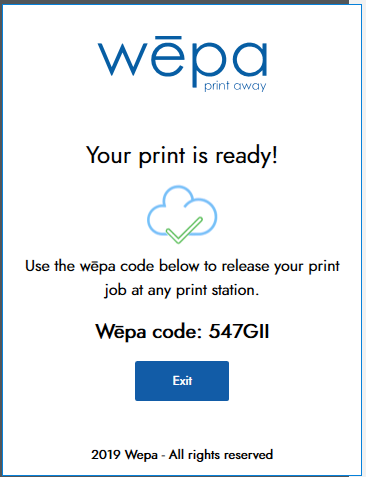
- A Wepa code will be provided after the document uploads:
- At the wepa print station, select ‘Don’t Have A Card’ button at the bottom and then ‘I Have A Wepa Code’. Enter the 6 alpha-numeric Wepa Code and then ‘Submit’
- The uploaded file will appear. Select the cog settings icon on the right to adjust the print settings if needed. Select ‘Print’ at the bottom when ready to proceed to the payment view:
Cloud/USB Print Directly at Print Station
- Any user can visit a Wepa print station without uploading a file and print directly at the print station.
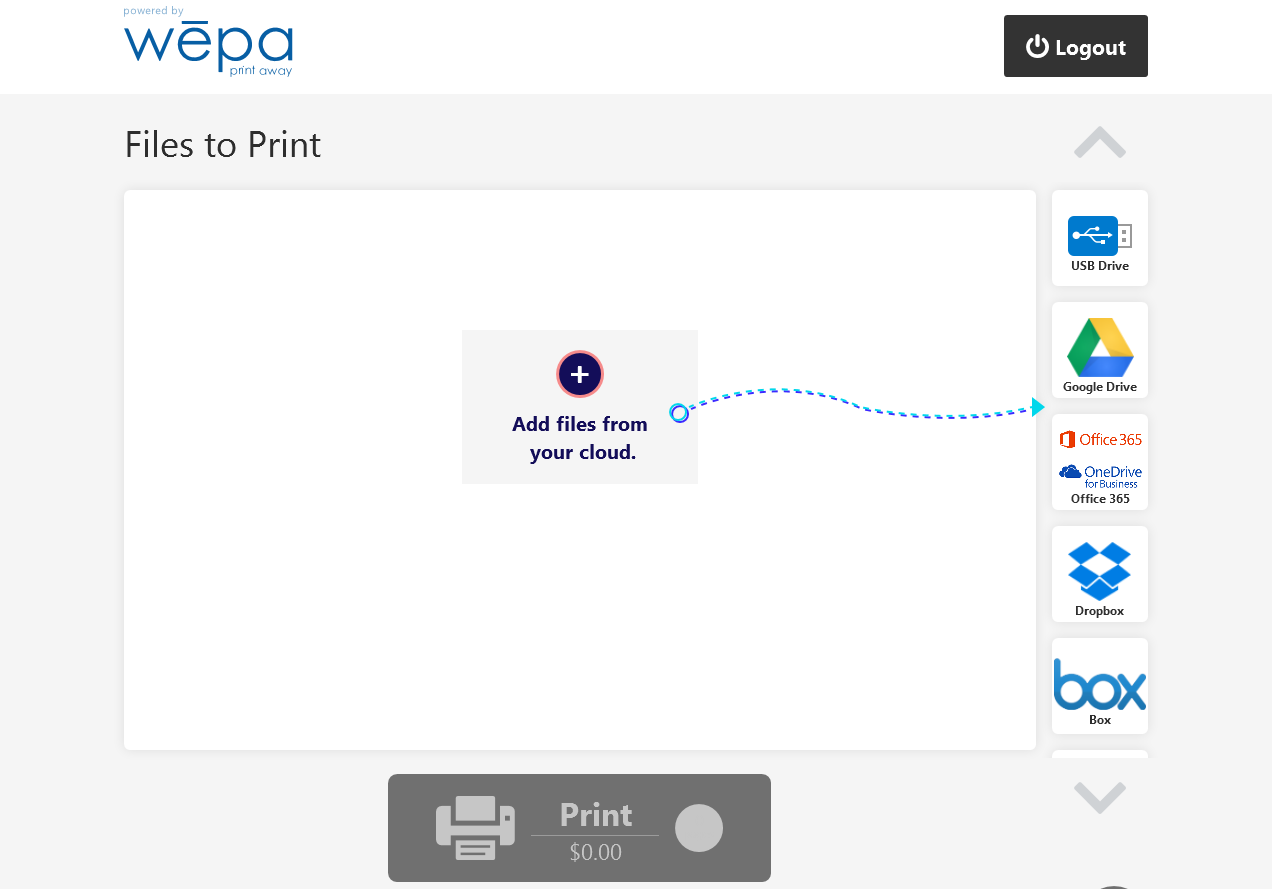
- Select ‘Don’t Have A Card’ button at the bottom and then ‘Print From Cloud or USB (no account)’ button.
- Next, insert a USB device or select a cloud provider on the right and login to get access to the cloud provider files:
- A file explorer will appear showing the folders and files available:
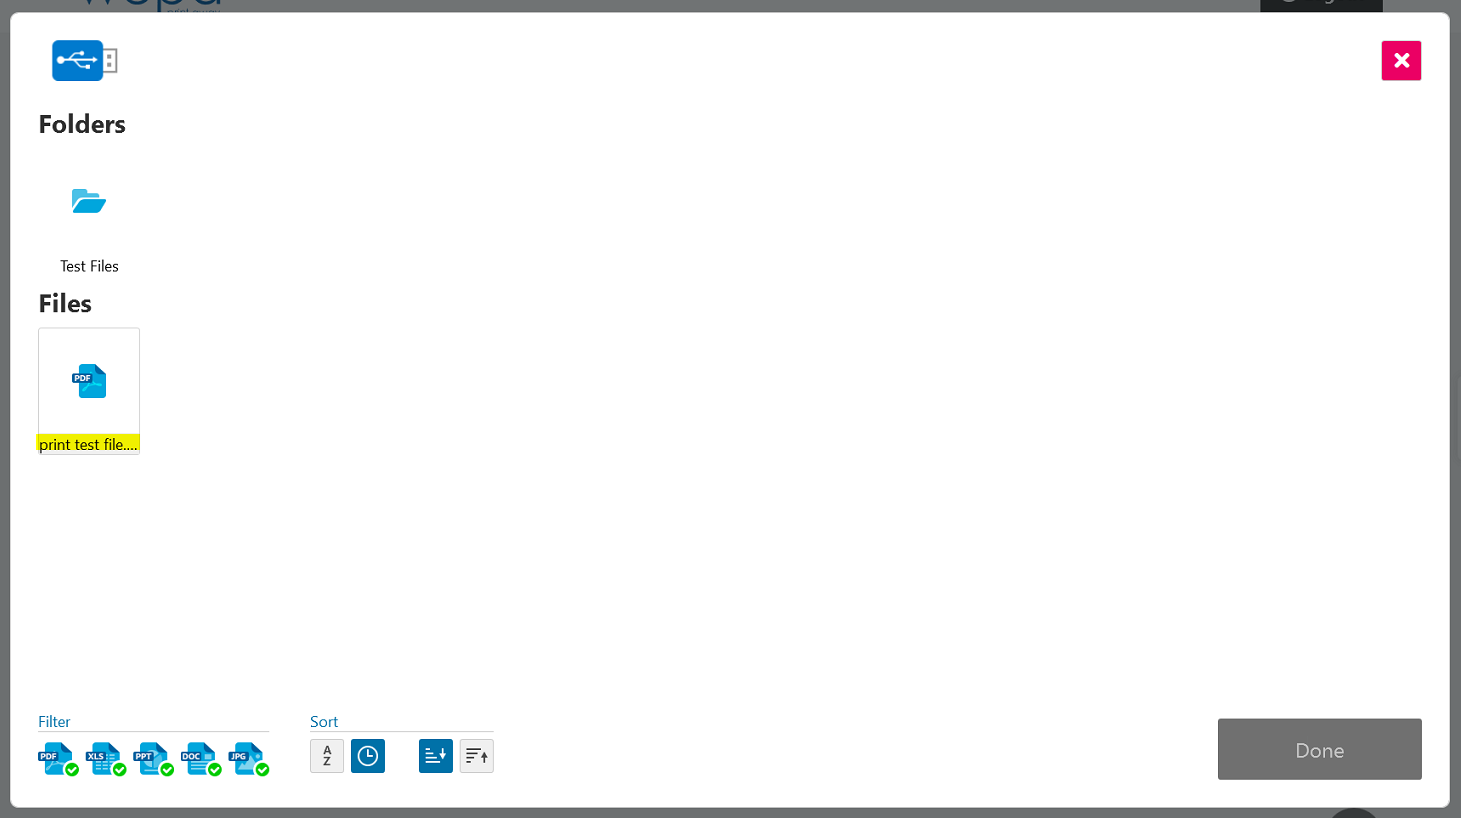
- Select a file to set the print settings and/or preview the file. Select ‘OK’ in the lower right to proceed, followed by ‘Done’ on the file explorer to prepare the file for printing:
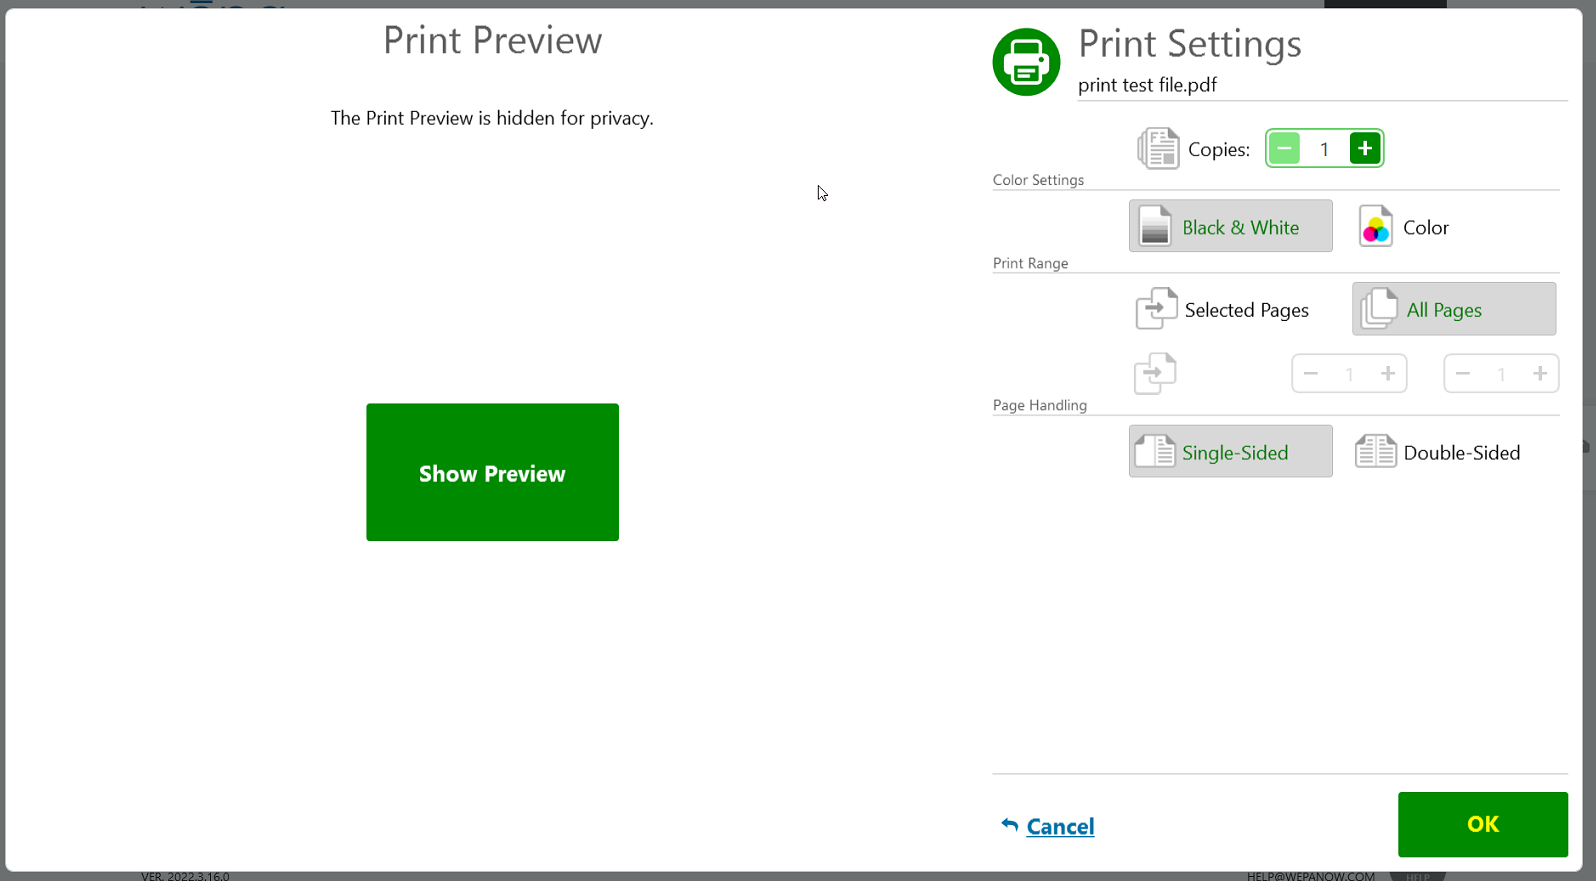
- Once the file is prepared, it will appear in the print queue with the print settings. Select ‘Print’ at the bottom to proceed to the payment view:

Payment Methods
- After selecting ‘Print’ at the wepa print station, the payment view will appear with options:
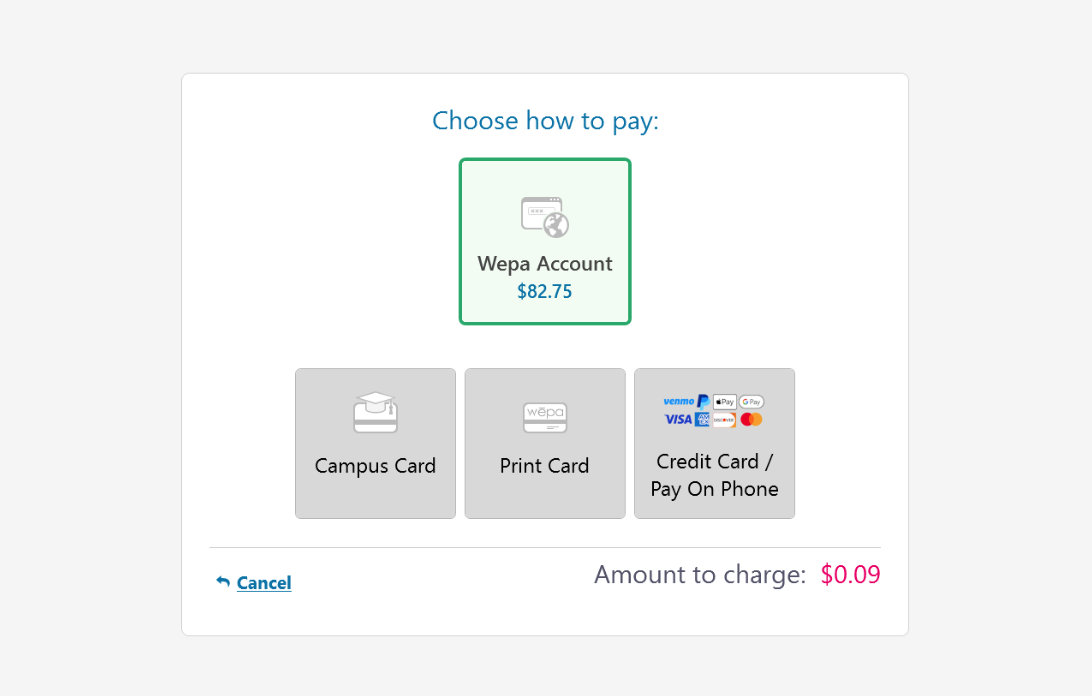
- The ‘Wepa Account’ payment option is for users with an account setup with wepa. A username/password or a campus card associated with your account will be needed to proceed with this option.
- The ‘Campus Card’ payment option is for users that have a campus card or guest campus card if available.
- The ‘Print Card’ payment option is for Wepa print cards.
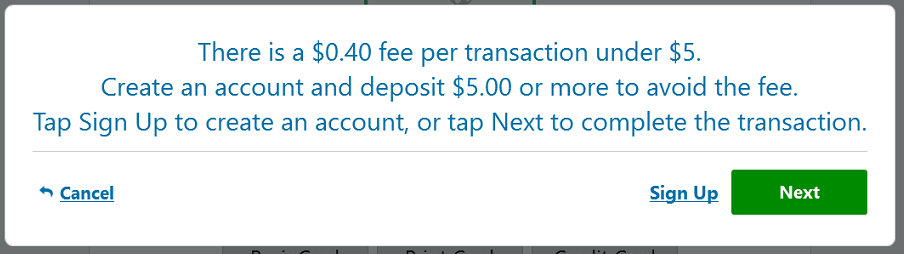
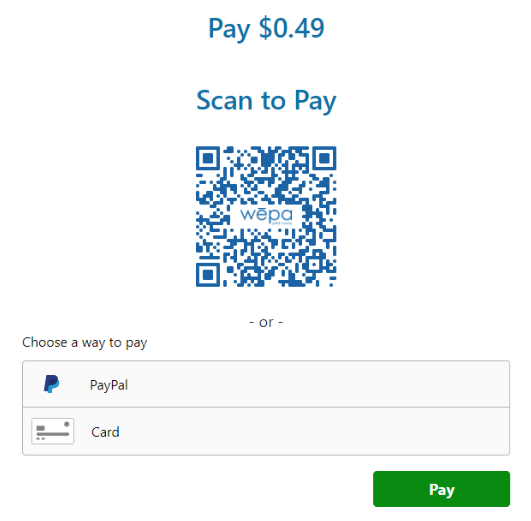
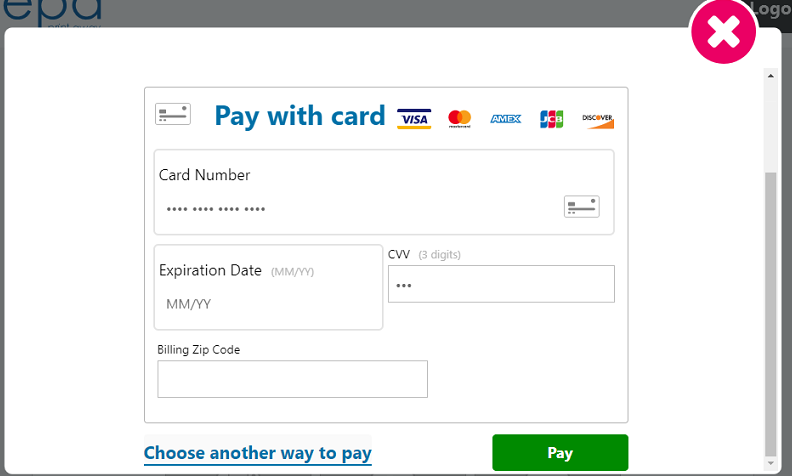
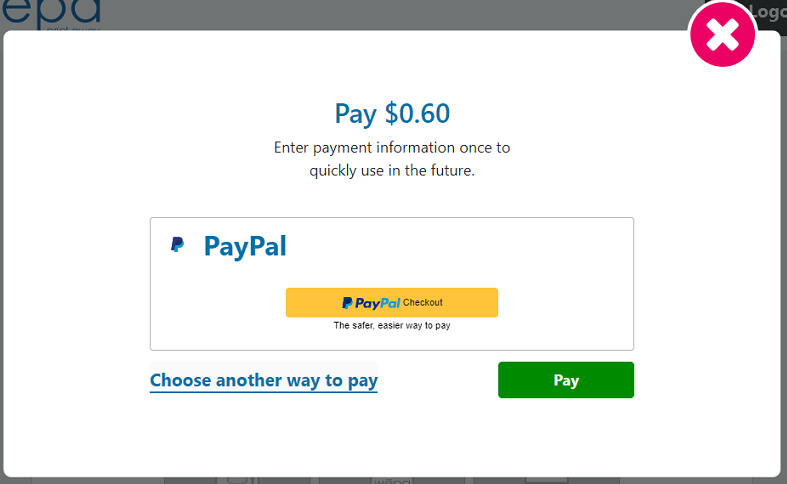
- The ‘Credit Card / Pay On Phone’ option is for using a credit card or payment service. NOTE – there is a $0.40 fee per transaction under $5.00. A user can create a free Wepa account to deposit a minimum of $5.00 and avoid the fee.