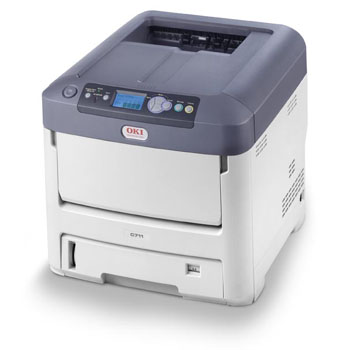
The following post provides basic troubleshooting and supplies information for the C711/C712 Color Printer such as consumable alerts, replacing consumable videos, and paper jams:
- Troubleshooting Tips
- Alerts
- Paper Jam Prevention
- Paper Jam Sensor Error Codes
- Duplex Unit
- Fuser Inspection
- LED Heads
- Supply Tips
- Consumable Life Spans
- Alerts
- Replacing Components Prior to End of Life
- Supply Manager Contact
C711 COLOR PRINTER
TROUBLESHOOTING TIPS
ALERTS
BASIC YELLOW ALERTS
- Paper_Low_Warning: Printer Tray 1 is empty
- Printer_Low_Toner: Printer toner is low, less than 10% remaining
- Paper_Incorrect_Tray_Size: Printer tray size needs to be changed to Letter
- Belt_Low: Printer belt is low, less than 5% remains- change after belt reaches 2%
- Fuser_Low: Printer fuser is low, less than 5% remains- change after fuser reaches 2%
- Drum_Low: Printer drum is low, less than 5% remains- change after drum reaches 2%
BASIC RED ALERTS
- Belt_Critical: Printer belt needs to be changed – Replacing Belt Video Link
- Fuser_Critical: Printer fuser needs to be changed – Replacing Fuser Video Link
- Drum_Critical: Printer drum needs to be changed – Replacing Drum Video Link
- Printer_Critical_Toner: Printer toner is low – Replacing Toner Video Link
- Paper_Out_Warning: Printer is out of paper – Replacing Paper Video Link
PAPER JAM PREVENTION
The printer is set to feed paper from both Tray 1 (top tray) and Tray 2 (bottom tray. We recommend swapping paper trays every time paper is restocked. Also be sure that BOTH trays are set to Letter size.
- Always fan the paper stack on all four sides prior to placing the paper in the tray.
- Do not leave space between the paper, guides and rear stopper.
- Do not overfill the paper tray.
- Do not load damaged or warped paper.
- Load only the 8.5” x 11” paper that is provided by into the trays.
- Gently close the paper tray.
- Do not pull the paper tray out during printing.
PAPER JAM SENSOR ERROR CODES
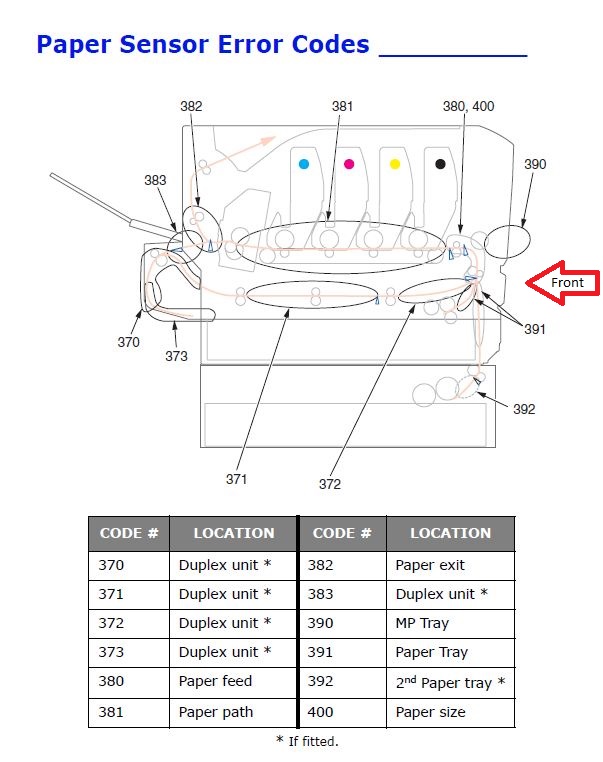
Below is a diagram of the paper jam sensor code locations for the C711/C712 Color printer:
The most common errors are 381, 382, 391 and 392. If a jam occurs, make sure all paper pieces are removed. If a jam occurs IN the fuser (with part of paper sticking out of both ends of the rollers), use the blue trigger on the right to release the pressure on the rollers before pulling out the paper. This prevents the paper from being ripped.
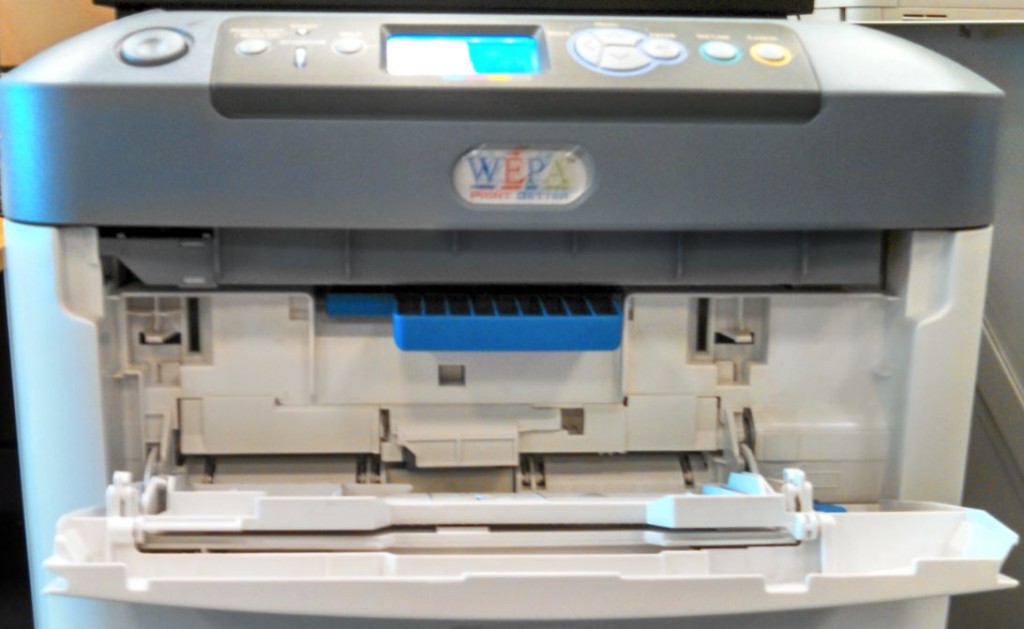
For 391, 390, and 380 paper jams, open the front flap then pull up on the blue handle to open the front face (see picture below) to check for paper.
DUPLEX UNIT
Paper Jam error codes 383, 370, 371, 372, and 373 indicate to check the duplexer unit. The following link is how to check the Duplex Unit.
FUSER INSPECTION
The fuser is the most common cause for paper jams caused by over heating. The 382 paper jam error code is the location of the fuser. A 928 fatal error may also occur which is specifically in regards to the fuser motor malfunction. To clear the 928 fatal error, power cycle / reboot the printer. If the 928 fatal error continues to occur, the fuser will most likely need to be replaced. Notify wēpa support (800.675.7639 / help@wepanow.com / Chat Below) prior to replacing fuser for confirmation of 928 fatal error frequency.
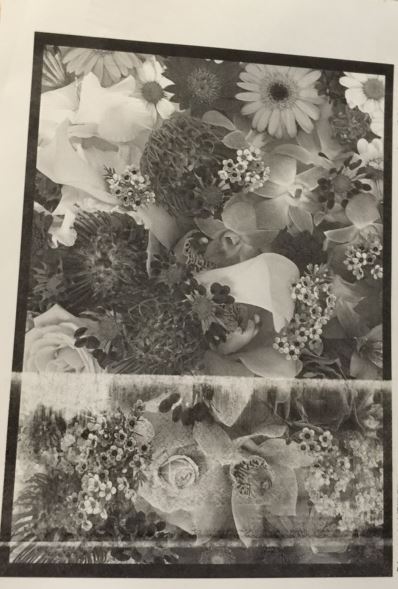
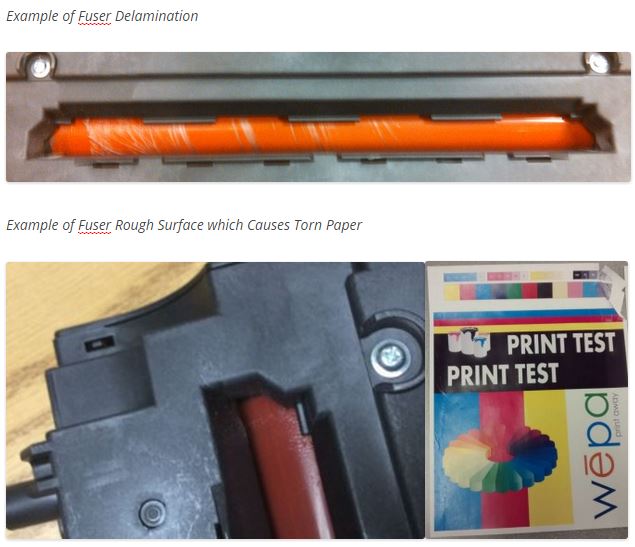
If the 382 paper jam occurs within a small time frame, remove the fuser and visually inspect the middle orange roller portion for delamination or a rough surface. The fuser middle orange portion should be smooth. If there are any physical defects, replace the fuser and notify wēpa support (800.675.675.7639 / help@wepanow.com / Chat Below) on whether to discard or send back to wēpa. We will only request to send back if the fuser was above 80% prior to replacing. Important Note: Fuser may be extremely hot. ALWAYS use the top middle handle to remove fuser.
Example of Fuser Paper Quality Issue
LED HEADS
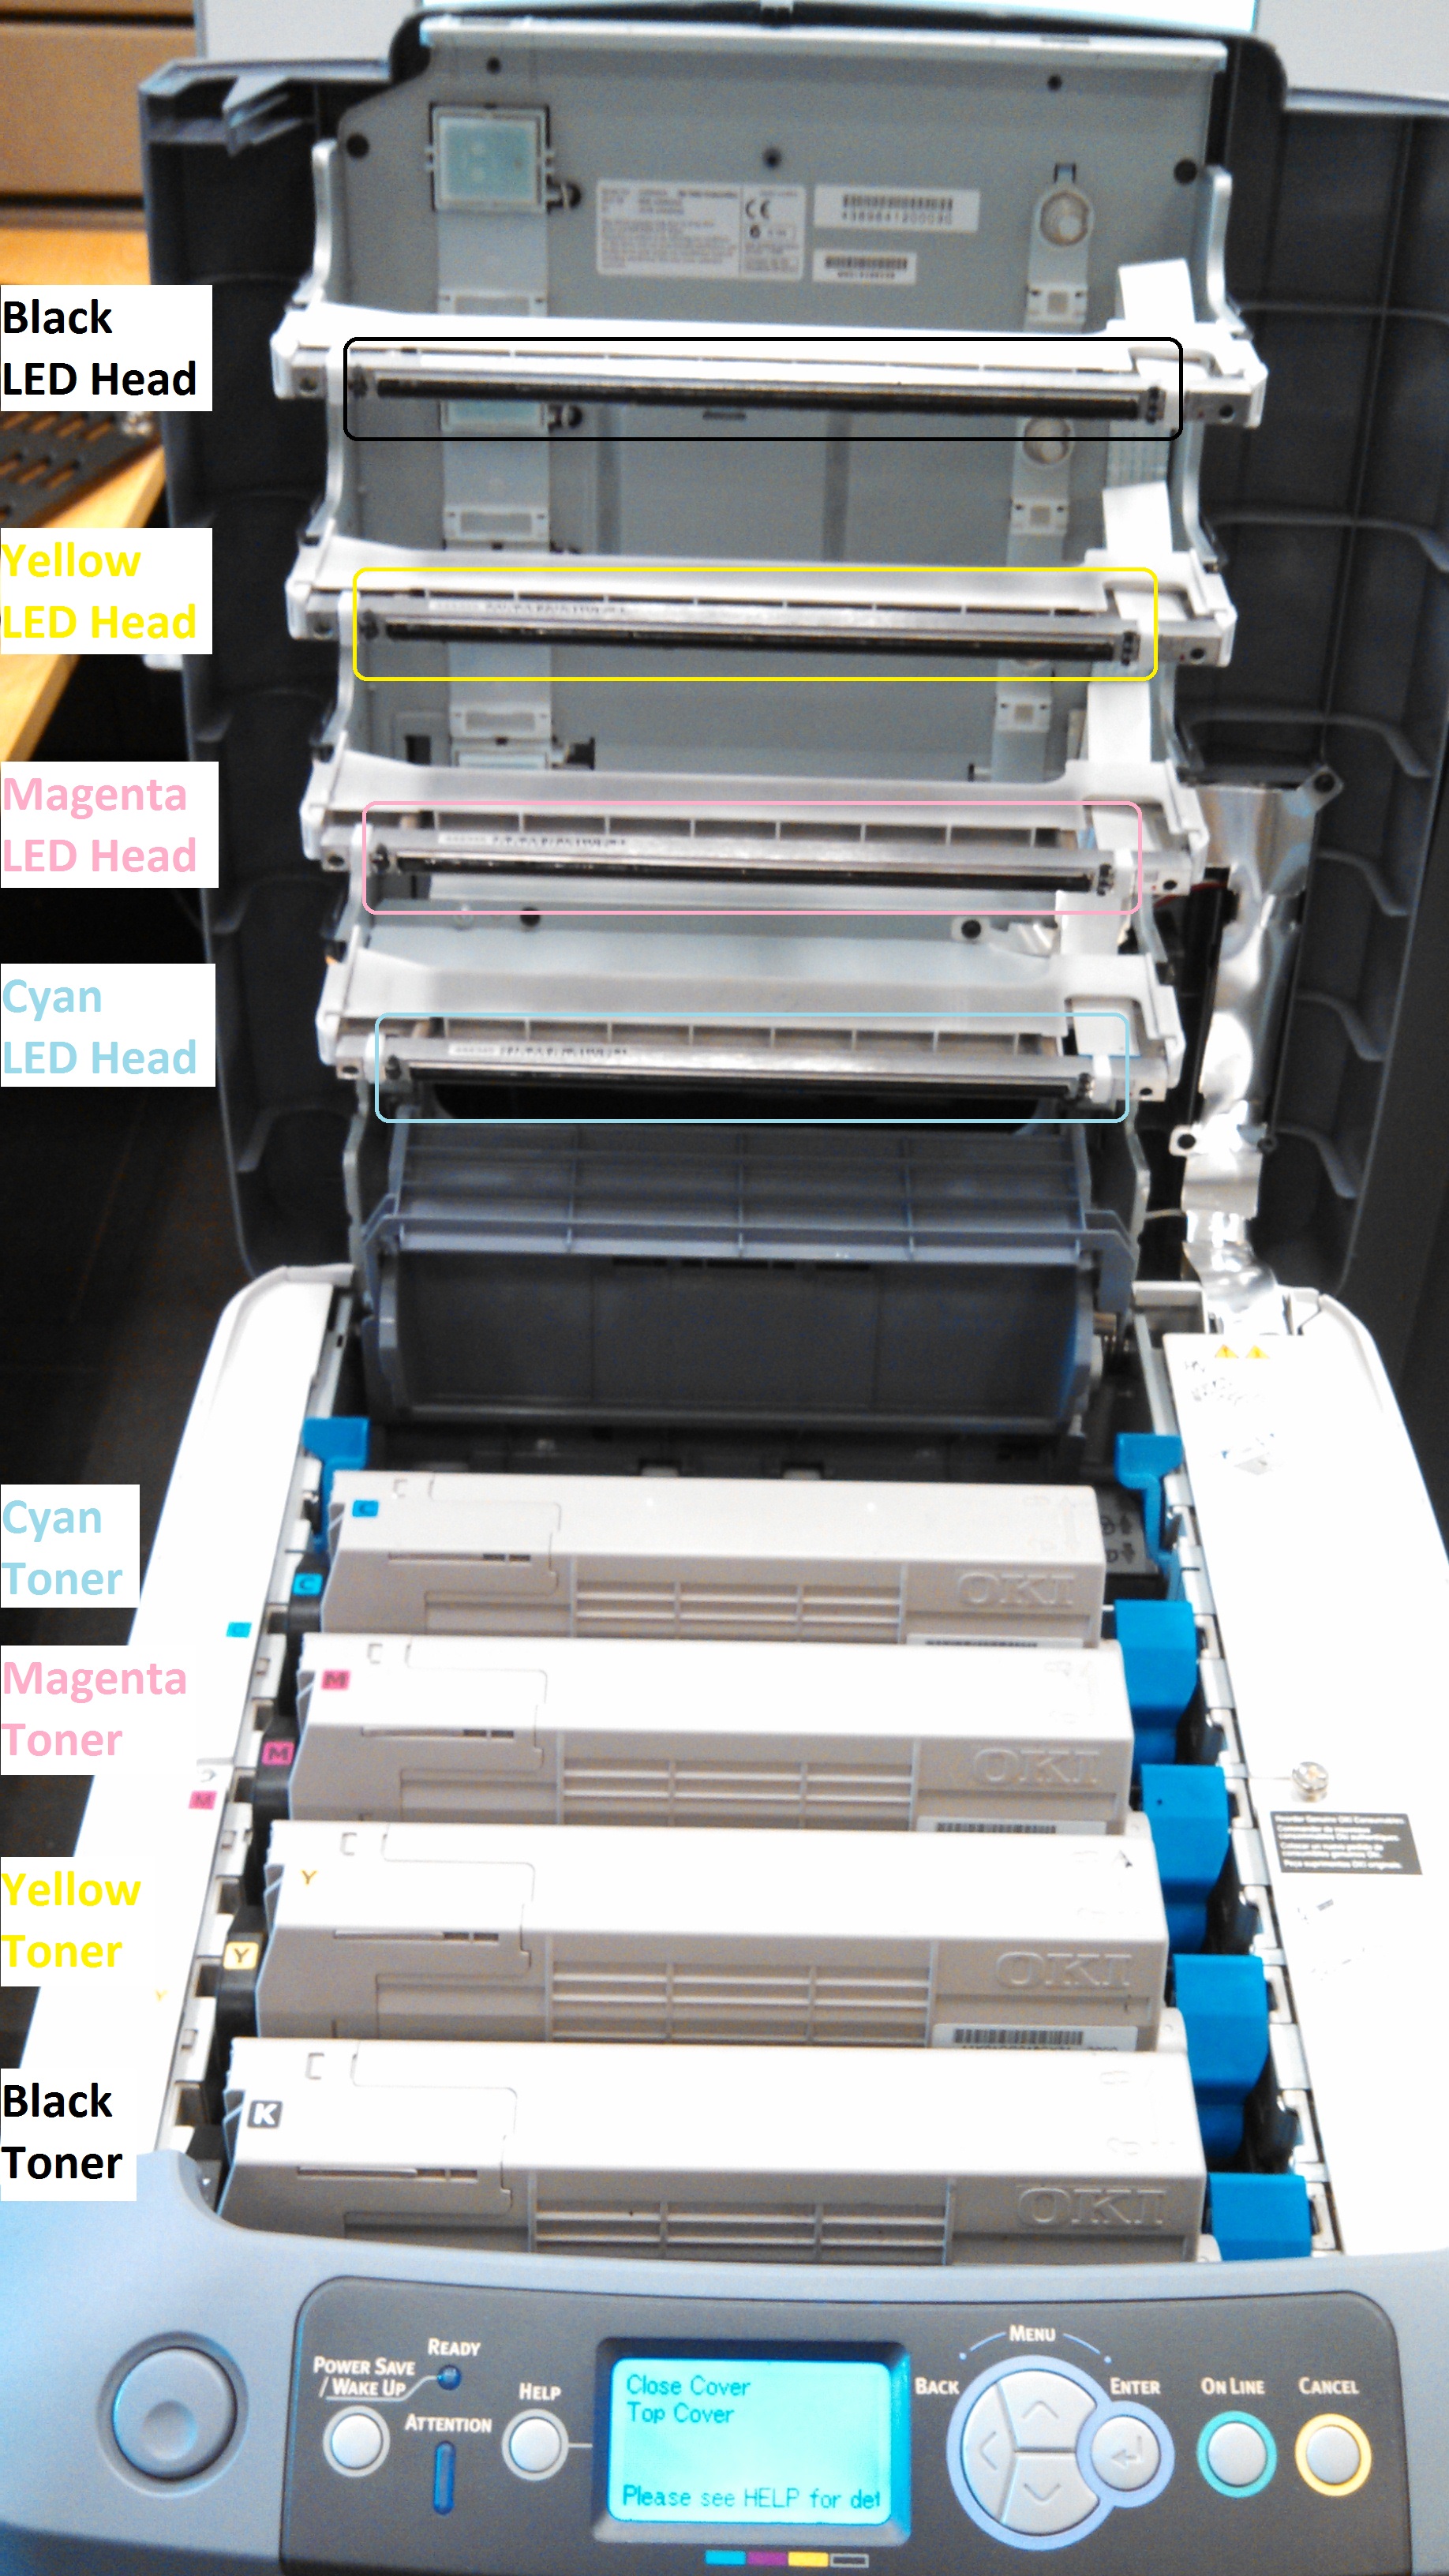
Each toner/drum unit has a corresponding LED head that is located underneath the top cover. Below is a diagram with the LED heads labeled at the top and the toner/drum units at the bottom.
LED Head Diagram
Print quality issues can occur if toner ink builds up on the LED head where the LED heads need to be cleaned by wiping with a soft cloth. Typical symptoms of LED head issues are vertical blank spaces from top to bottom. Below are examples of LED head print quality issues:
Examples of LED Head Print Quality Issues
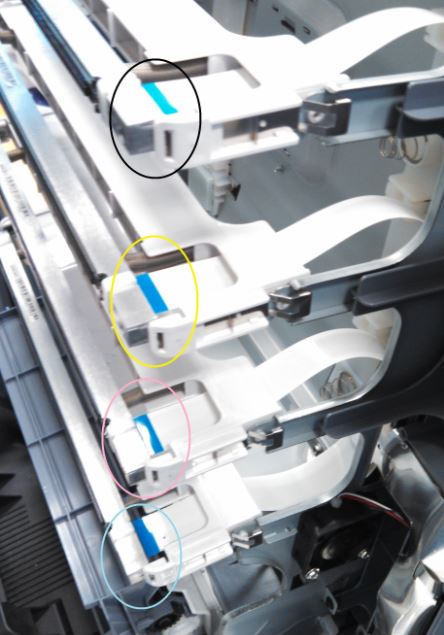
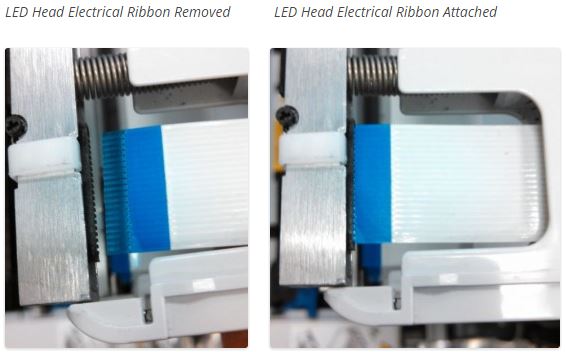
If after wiping down the LED heads and the print quality issues still occur, re-seating the LED head electrical ribbon may resolve the issue. The LED head electrical ribbons are located on the right side shown below.
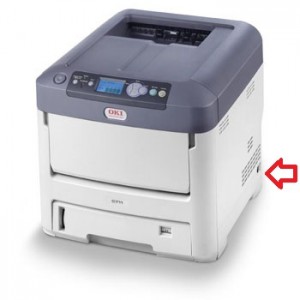
EXTREMELY IMPORTANT: Turn printer OFF before removing any of the LED head electrical ribbons. If printer is NOT OFF, the printer can be permanently damaged. To turn OFF the printer, push the ON/OFF toggle switch on the right side of the printer.
After turning off the printer, un-seed / remove each LED head electrical ribbon, then re-insert / attach. After confirming each LED head electrical ribbon is attached, turn the printer back ON using the toggle switch on the right side.
If the print quality issues continue after cleaning and reseeding the LED heads, notify wēpa support (800.675.7639 / help@wepanow.com / Chat Below).
SUPPLY TIPS
wēpa monitors each print station’s print volume on every campus and provides the supplies
necessary to keep the print stations running properly. We have provided a few pointers and
tips below.
CONSUMABLE LIFE SPANS
Each printer consumable (toner, drum, belt, fuser) has a different print life expectancy and
therefore each will need to be replaced at a particular time.
- Toner: approximately 10,000-11,000 pages
- Drum: approximately 20,000-22,000 pages
- Belt and Fuser: approximately 60,000 pages
CONSUMABLE YELLOW ALERTS
- Toner: 10% = approximately 1,000 pages remain
- Drum: 5% = approximately 1,000 pages remain
- Belt & Fuser: 5% = approximately 3,000 pages remain
CONSUMABLE RED ALERTS
- Toner: 0%
- Drum: 2%
- Belt & Fuser: 2%
REPLACING COMPONENTS PRIOR TO END OF LIFE
- To prevent unnecessary waste, please wait to replace the component until after you receive
a low alert. - If there is a problem, please notify wēpa support (800.675.7639 / help@wepanow.com / Chat Below) immediately so they may provide
assistance in resolving the issue. - It is possible that wēpa will request a defective item be returned to us. If that is the case, an RMA# will be provided along with a return label. Please notify wēpa support if you feel an item is defective so that further instruction may be provided.
- Please be sure to notify wēpa support if a component is replaced prior to receiving a low alert so we can ensure that we send additional supplies if needed
- If you feel that your print demands are greater than your current inventory, please contact our Supply Manager and we will send additional supplies.
SUPPLY MANAGER CONTACT
Kelley Stephens (kelley.stephens@wepanow.com)

