Quickly and conveniently print files by attaching them to an email, sending them to print@wepanow.com, and picking them up from any print station. The following support post provides more details!
Email-To-Print Tutorial
- Supported File Types: .doc, .docx, .xls, .xlsx, .ppt, .pptx, .pdf, .rtf, images (.jpg, .png, .bmp, .tif, .tiff)
- Maximum Size: 50 MB (your email provider may have size limitations as well)
Example Email
- Open a new email draft. Use the email address associated with your wēpa account to upload to your print queue. If a different email address is used, then you will be considered a ‘Guest’ and the wēpa code provided in Step 6 will be required to print.
- Enter print@wepanow.com in ‘To:’ field.
- Attach file(s) to email.
- Send email if desired print settings are black&white and single-sided.
- To change the print settings, enter “color” and/or “duplex” (double-sided) in the first line of the email body.
- For PowerPoint options, see the keywords below in the ‘PRINT SETTINGS’ section. Options will apply to all attached documents. Send multiple emails for each different set of print options.
- An automated email confirmation will appear in your Inbox within minutes. Allow more time for multiple documents or large file sizes. The confirmation email will provide details on which files were uploaded successfully or not with corresponding print settings.
- If the email address is not associated with a wepa account, a wepa code will be provided to release each print job at a print station.
- If the email address is associated with a wepa account, the file(s) will be available in print queue—simply log into your wepa account!
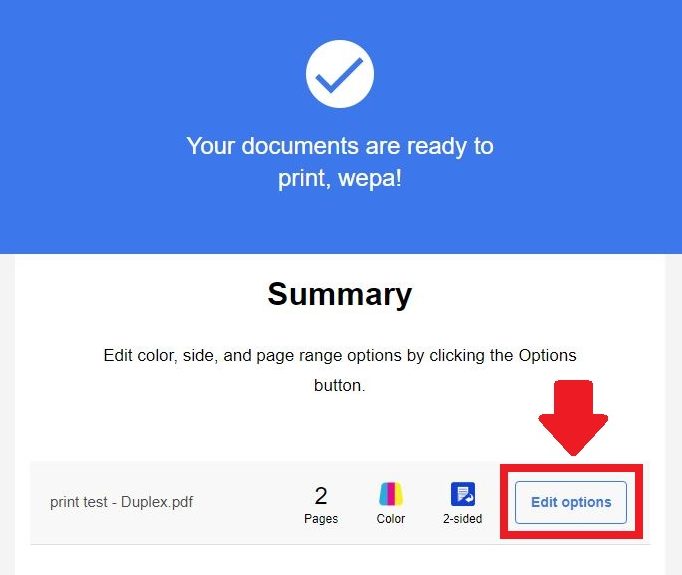
- New Feature! In the email reply by each successfully-uploaded file, there is now a button labeled Edit options. A webpage will load and you’ll be able to change more print setting options. The initial print settings will already be selected. Change any setting, then select Send print options to finalize the changes.
- Find your nearest print station from the email, confirm the print options and files you want to print, and print away!
PRINT SETTING KEYWORDS
- “Color” – print the document in color
- “Duplex” – print the document on front and back of each piece of paper
PowerPoint Documents
PowerPoint presentations will be printed as Full Page Slides unless specified with one of the below options:
- “slides or slides1” – Slides
- “handouts or handouts1” – Handouts, one per page
- “handouts2 or slides2” – Handouts, two per page
- “handouts3 or slides3” – Handouts, three per page
- “handouts4 or slides4” – Handouts, four per page
- “handouts6 or slides6” – Handouts, six per page
- “handouts9 or slides9” – Handouts, nine per page
- “notespages” – NotesPages: portrait orientation with each slide in upper half and lower half is blank for notes
- “outline” – Outline: all slides in order with outline of text.


