wepa institutional customers can own and manage a Google Cloud Print printer that works with wepa. This allows you to easily make it available to your users and managed devices.
HOW TO CREATE A DEDICATED WEPA GCP PRINTER
- Contact your wepa Project Manager or help@wepanow.com to obtain the wepa Google Cloud Print Assistant.
- Use the wepa Google Cloud Print Assistant to create and configure a Google Cloud Print printer for use with wepa.
- Provide the output from the Assistant to wepa
- wepa will let you know when to test a print with your new printer
HOW TO USE THE WEPA GOOGLE CLOUD PRINT ASSISTANT
Launch the Assistant by double-clicking the file provided by wepa.
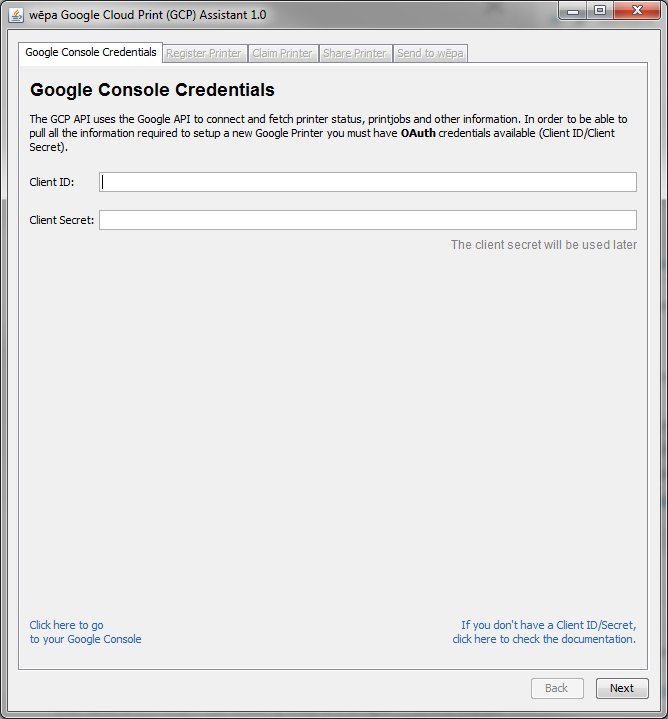
The Assistant uses your Google OAuth credentials to create and configure the printer.
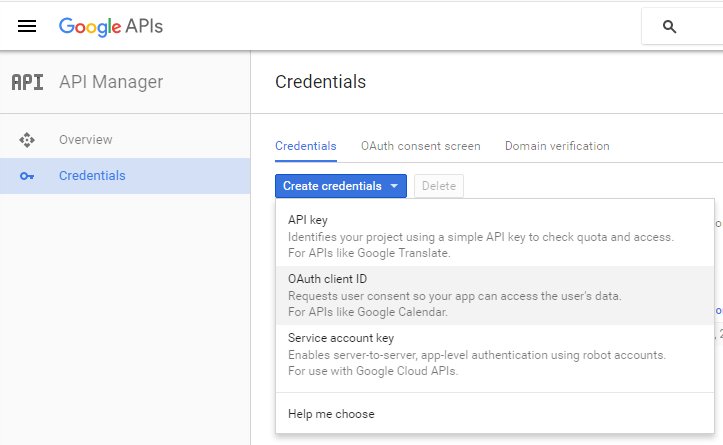
Click the link in the lower left of the Assistant to go to the Google Console and select Credentials on the left side.
Click “Create credentials” and choose “OAuth client ID”
Select “Web application” and enter a name
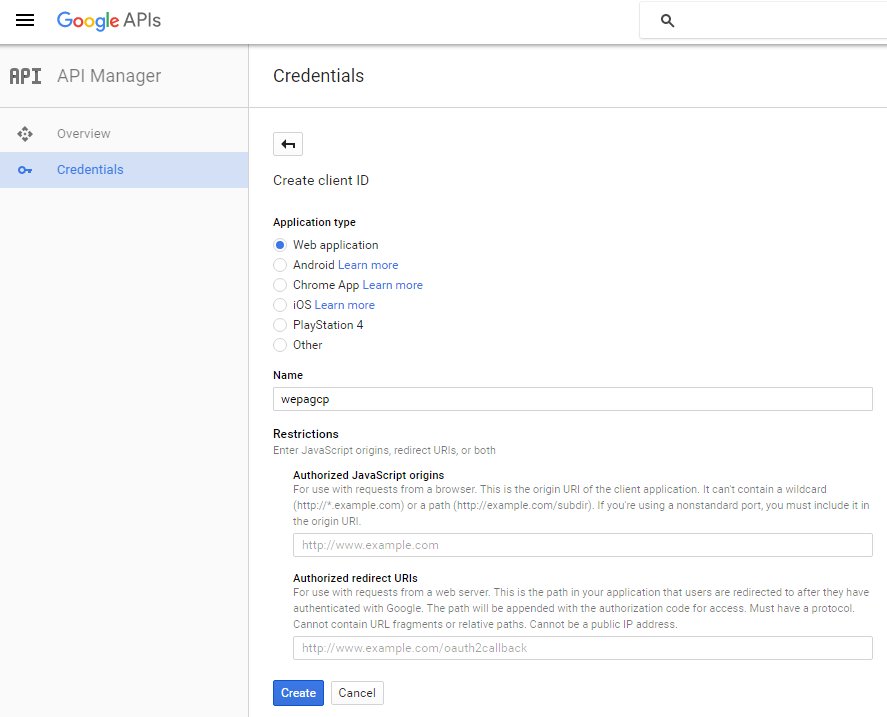
Click “Create”.
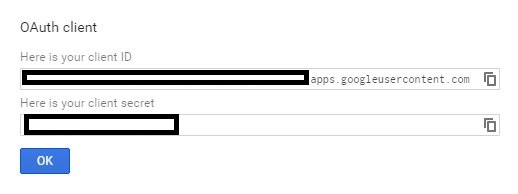
Copy the values from the dialog and enter them into the Assistant.
Click “Next” to continue.
On the Register Printer tab, enter a System Name, Display Name (optional), and Proxy.
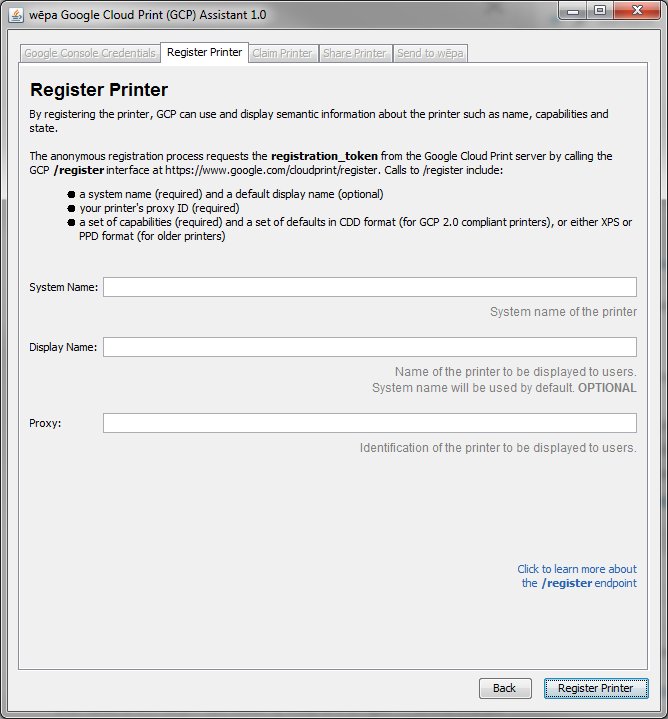
Click “Register Printer” after you have entered the names.
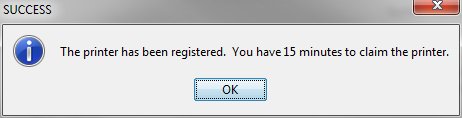
The tool will move to the Claim Printer tab after you press OK. You have 15 minutes to claim the just-created printer.
Click the “Click here to Claim the printer” button before the timer expires.

Your browser will launch so that you can claim the printer. After you have claimed the printer, return to the Assistant and click the “Printer claimed, Poll it” button in the bottom right.
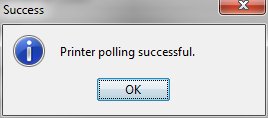
The Assistant will move the Share Printer tab when you press OK.

Follow the instructions in the Assistant to
- Make the printer public
- Remove the public printing quota
- Copy the Printer Share link and paste into the Assistant
Click “Finish” after you have added the Printer Share link at the top.
The Assistant will move to the Send to wepa tab.
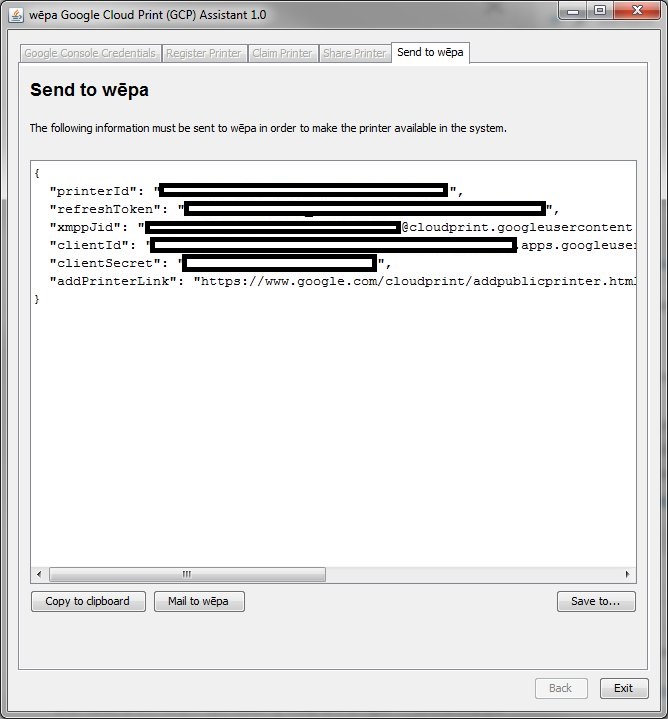
Copy or save the information and send it to your wepa contact, or use the “Mail to wepa” button to send a copy of the information to the wepa IT team.
wepa will reply to let you know when the printer is available for use.