The following post shows how to replace a display monitor for the G4 Print Station Model:
wēpa has two different print stations models at institutions with the major visual difference is one has a curved top frame (G4 Model) while the other has a flat top frame (G5 Model). This support post is for G4 Print Station Models:
Required Tools: Master Key & Philips Screw Driver
STEP 1: Power down print station by using the red button on the back at the bottom. Unplug the power cable connected to the wall outlet as well as the print station by the red button.
EXTREMELY IMPORTANT: Disconnect power from print station due to potential of shock.

STEP 2: Use the Master Key to remove back panels behind the monitor as well as the small panel below the monitor.
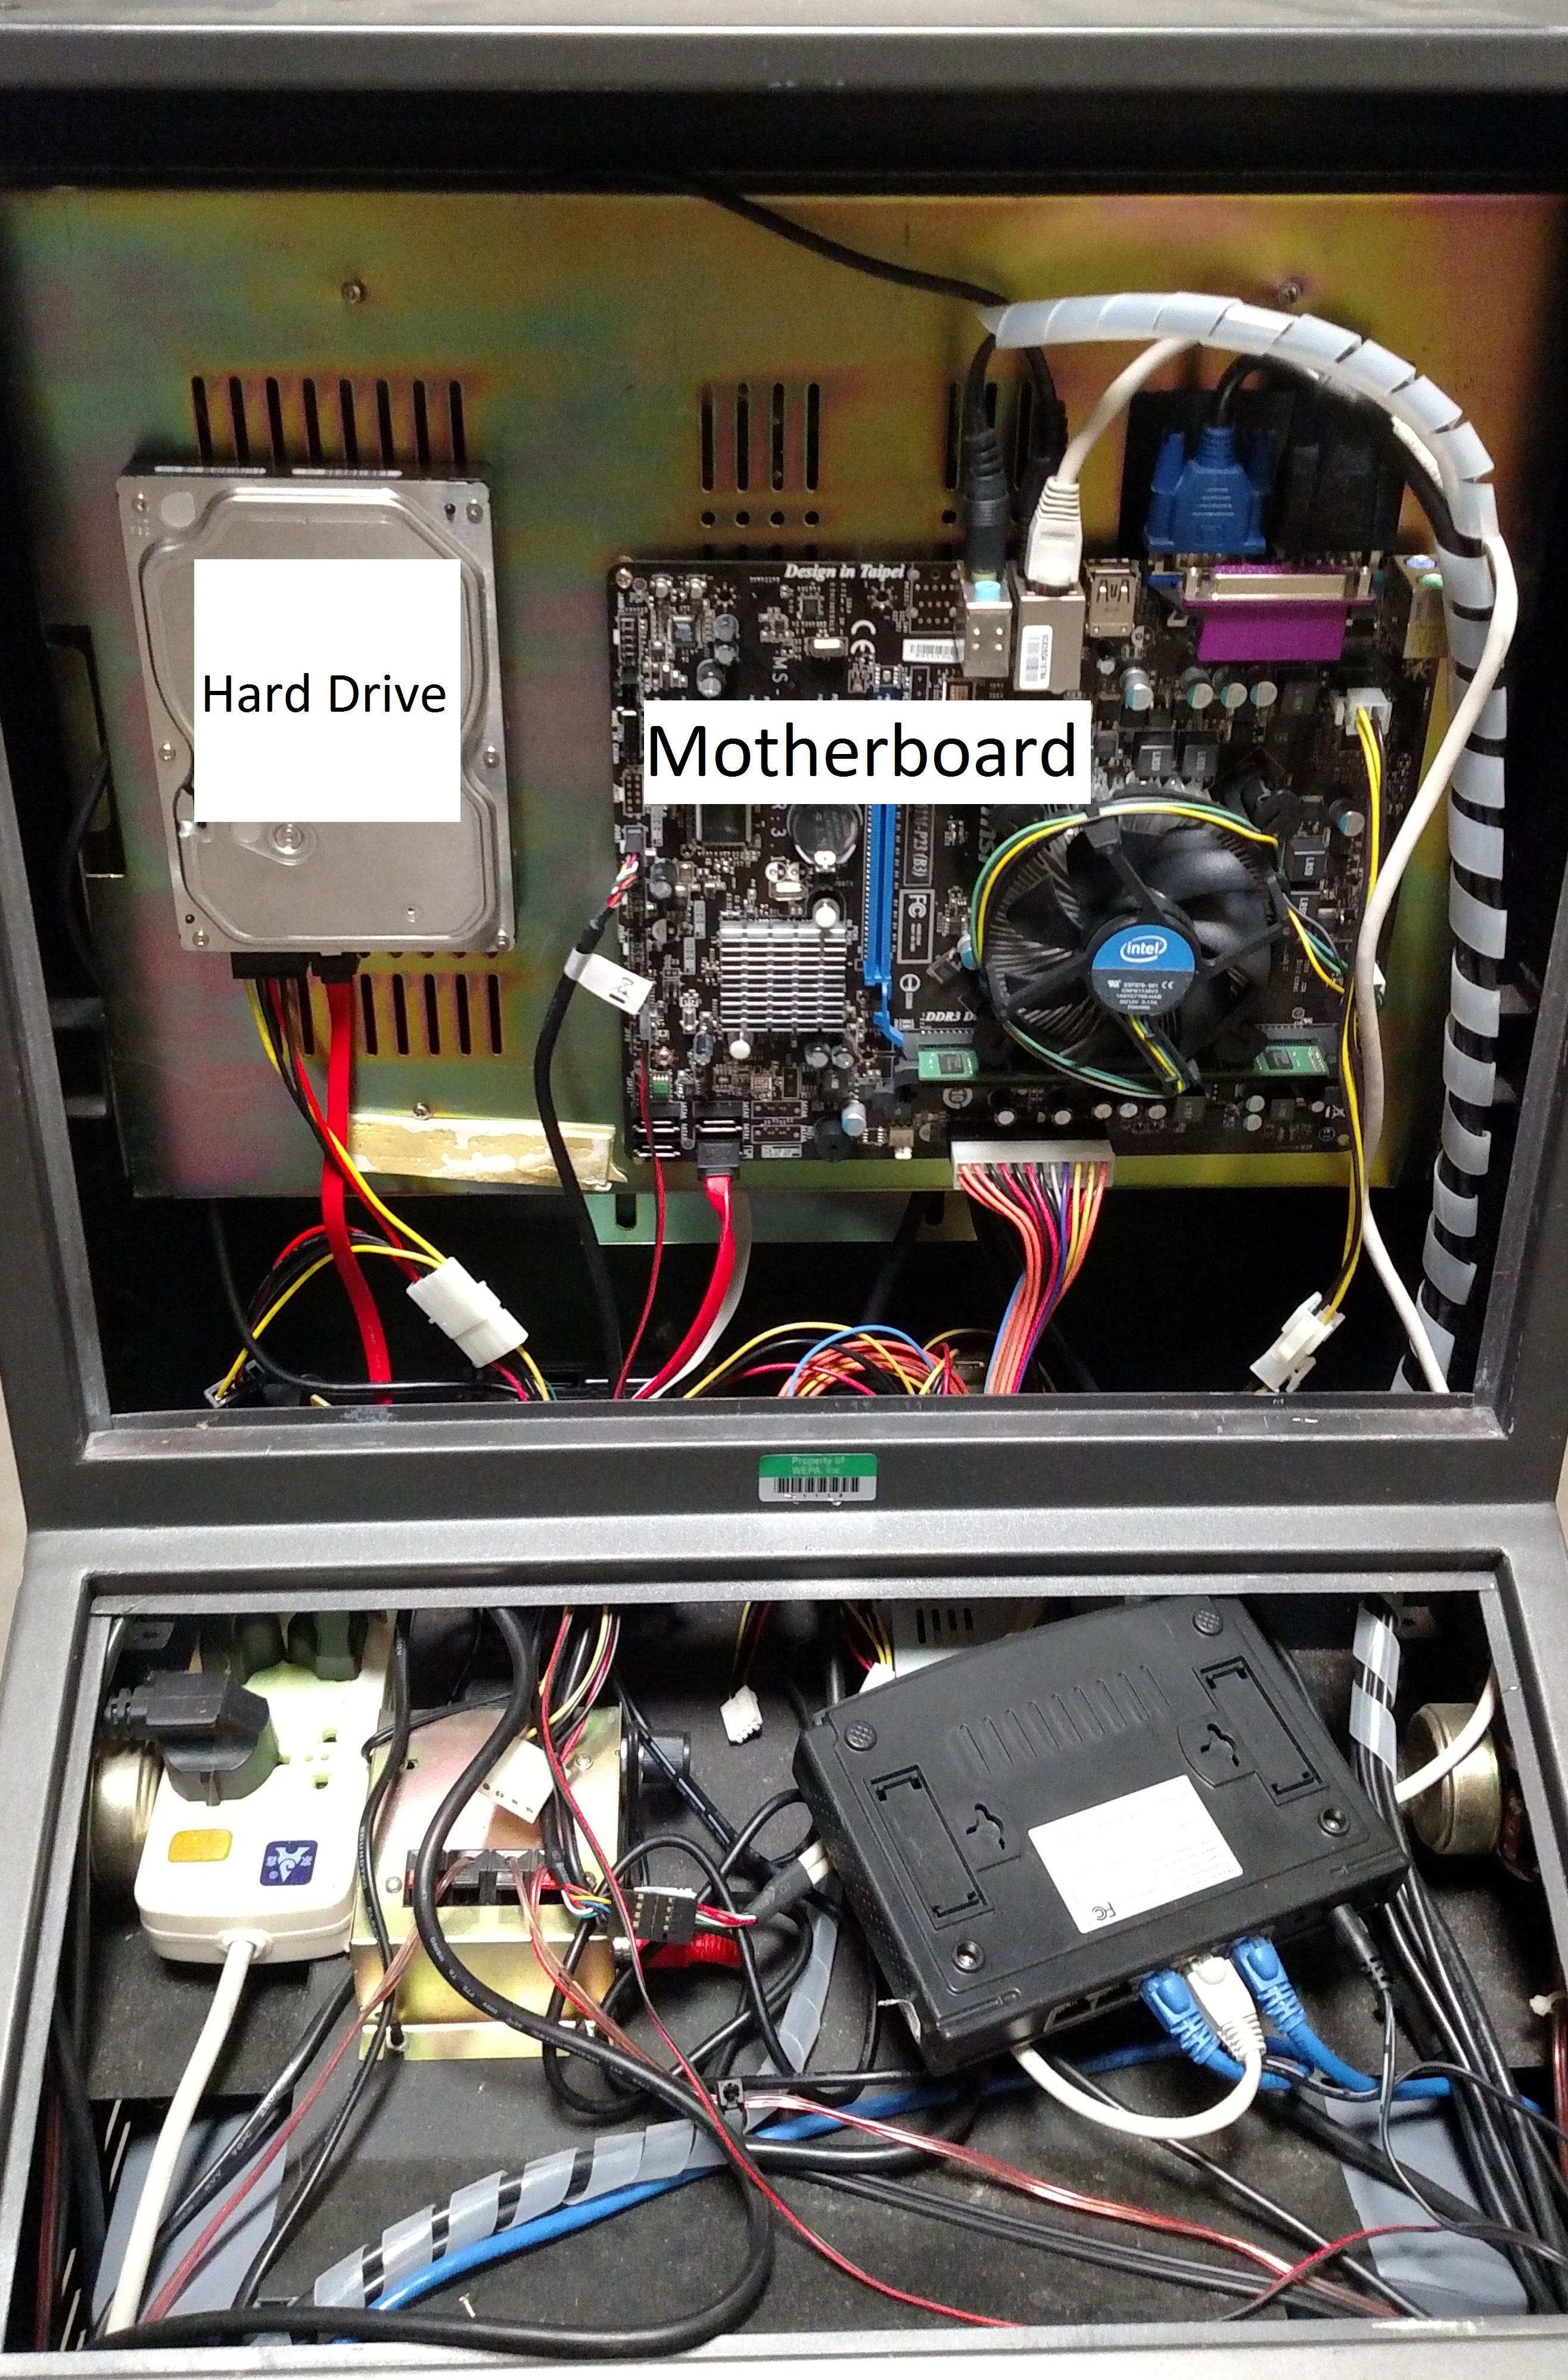
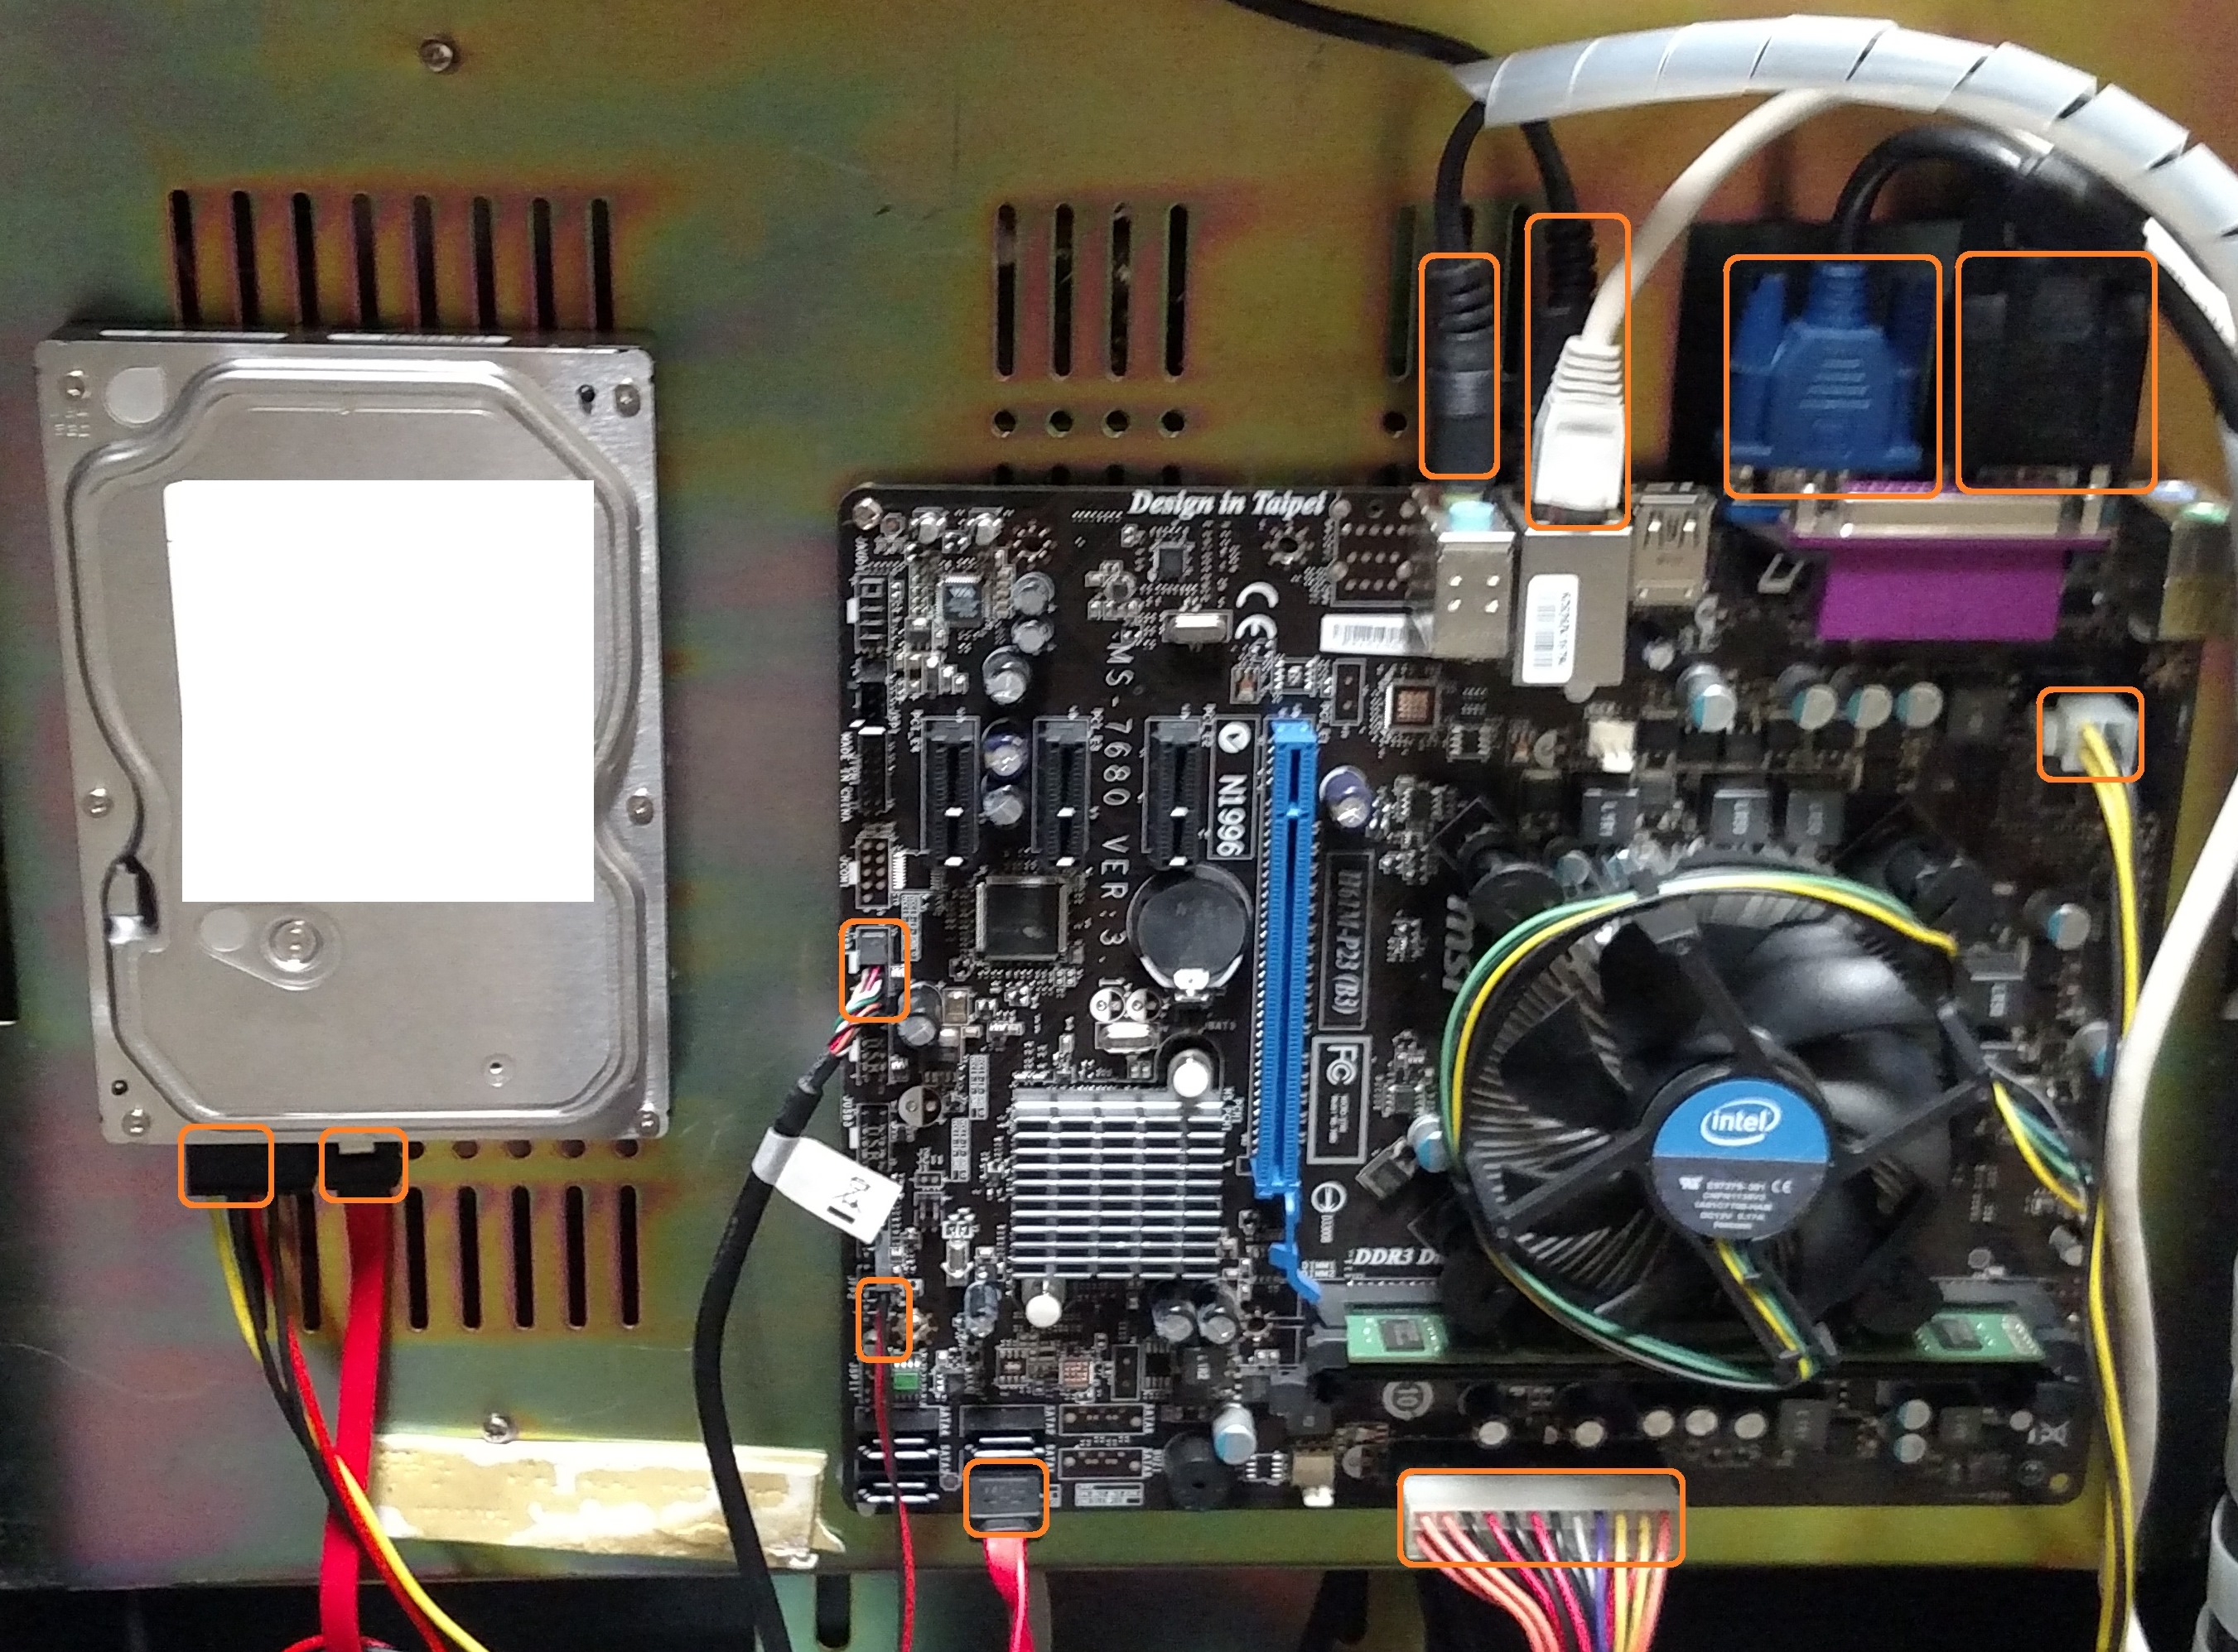
STEP 3: Unplug all cables from Motherboard and Hard Drive (cables to remove outlined in orange).
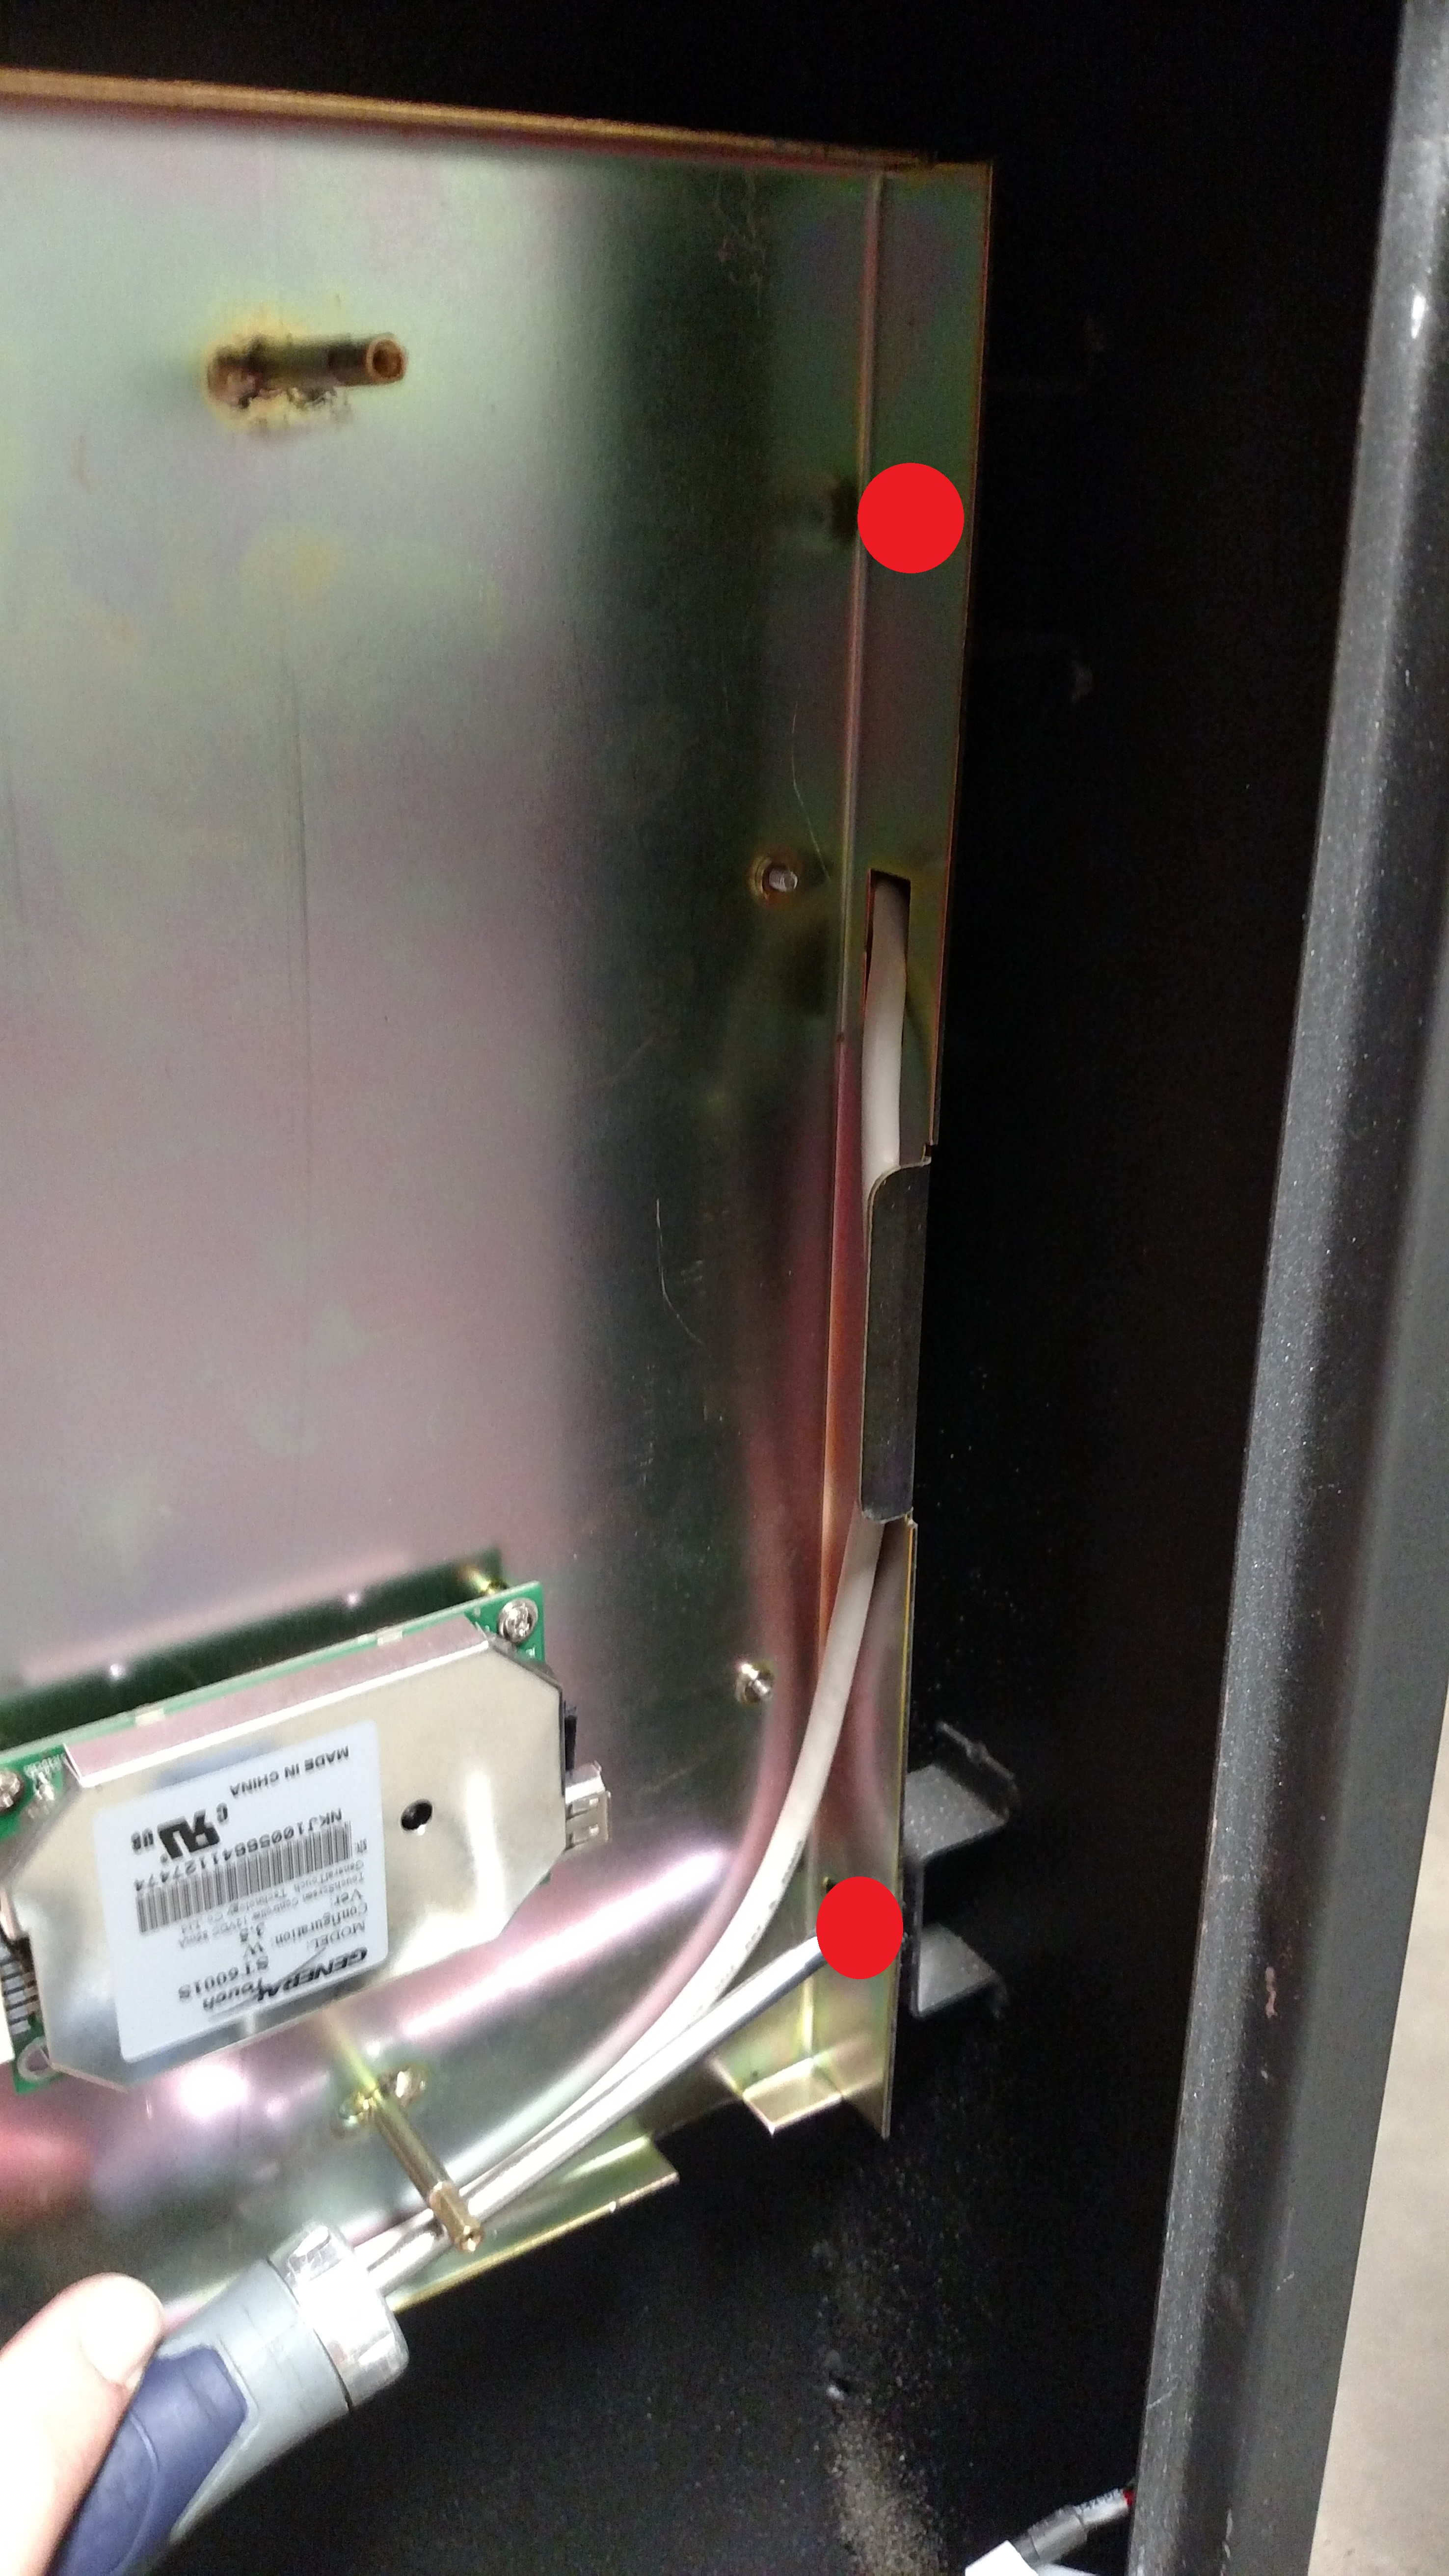
STEP 4: Drop Motherboard by removing the Philips screws (highlighted in red below).

STEP 5: Drop Motherboard pan by removing the Philips screws (highlighted red below).

STEP 6: Disconnect Monitor Circuit Board Ribbon Cable from VGA Board and place Motherboard pan to side.
EXTREMELY IMPORTANT: Disconnect power from print station due to potential of shock.

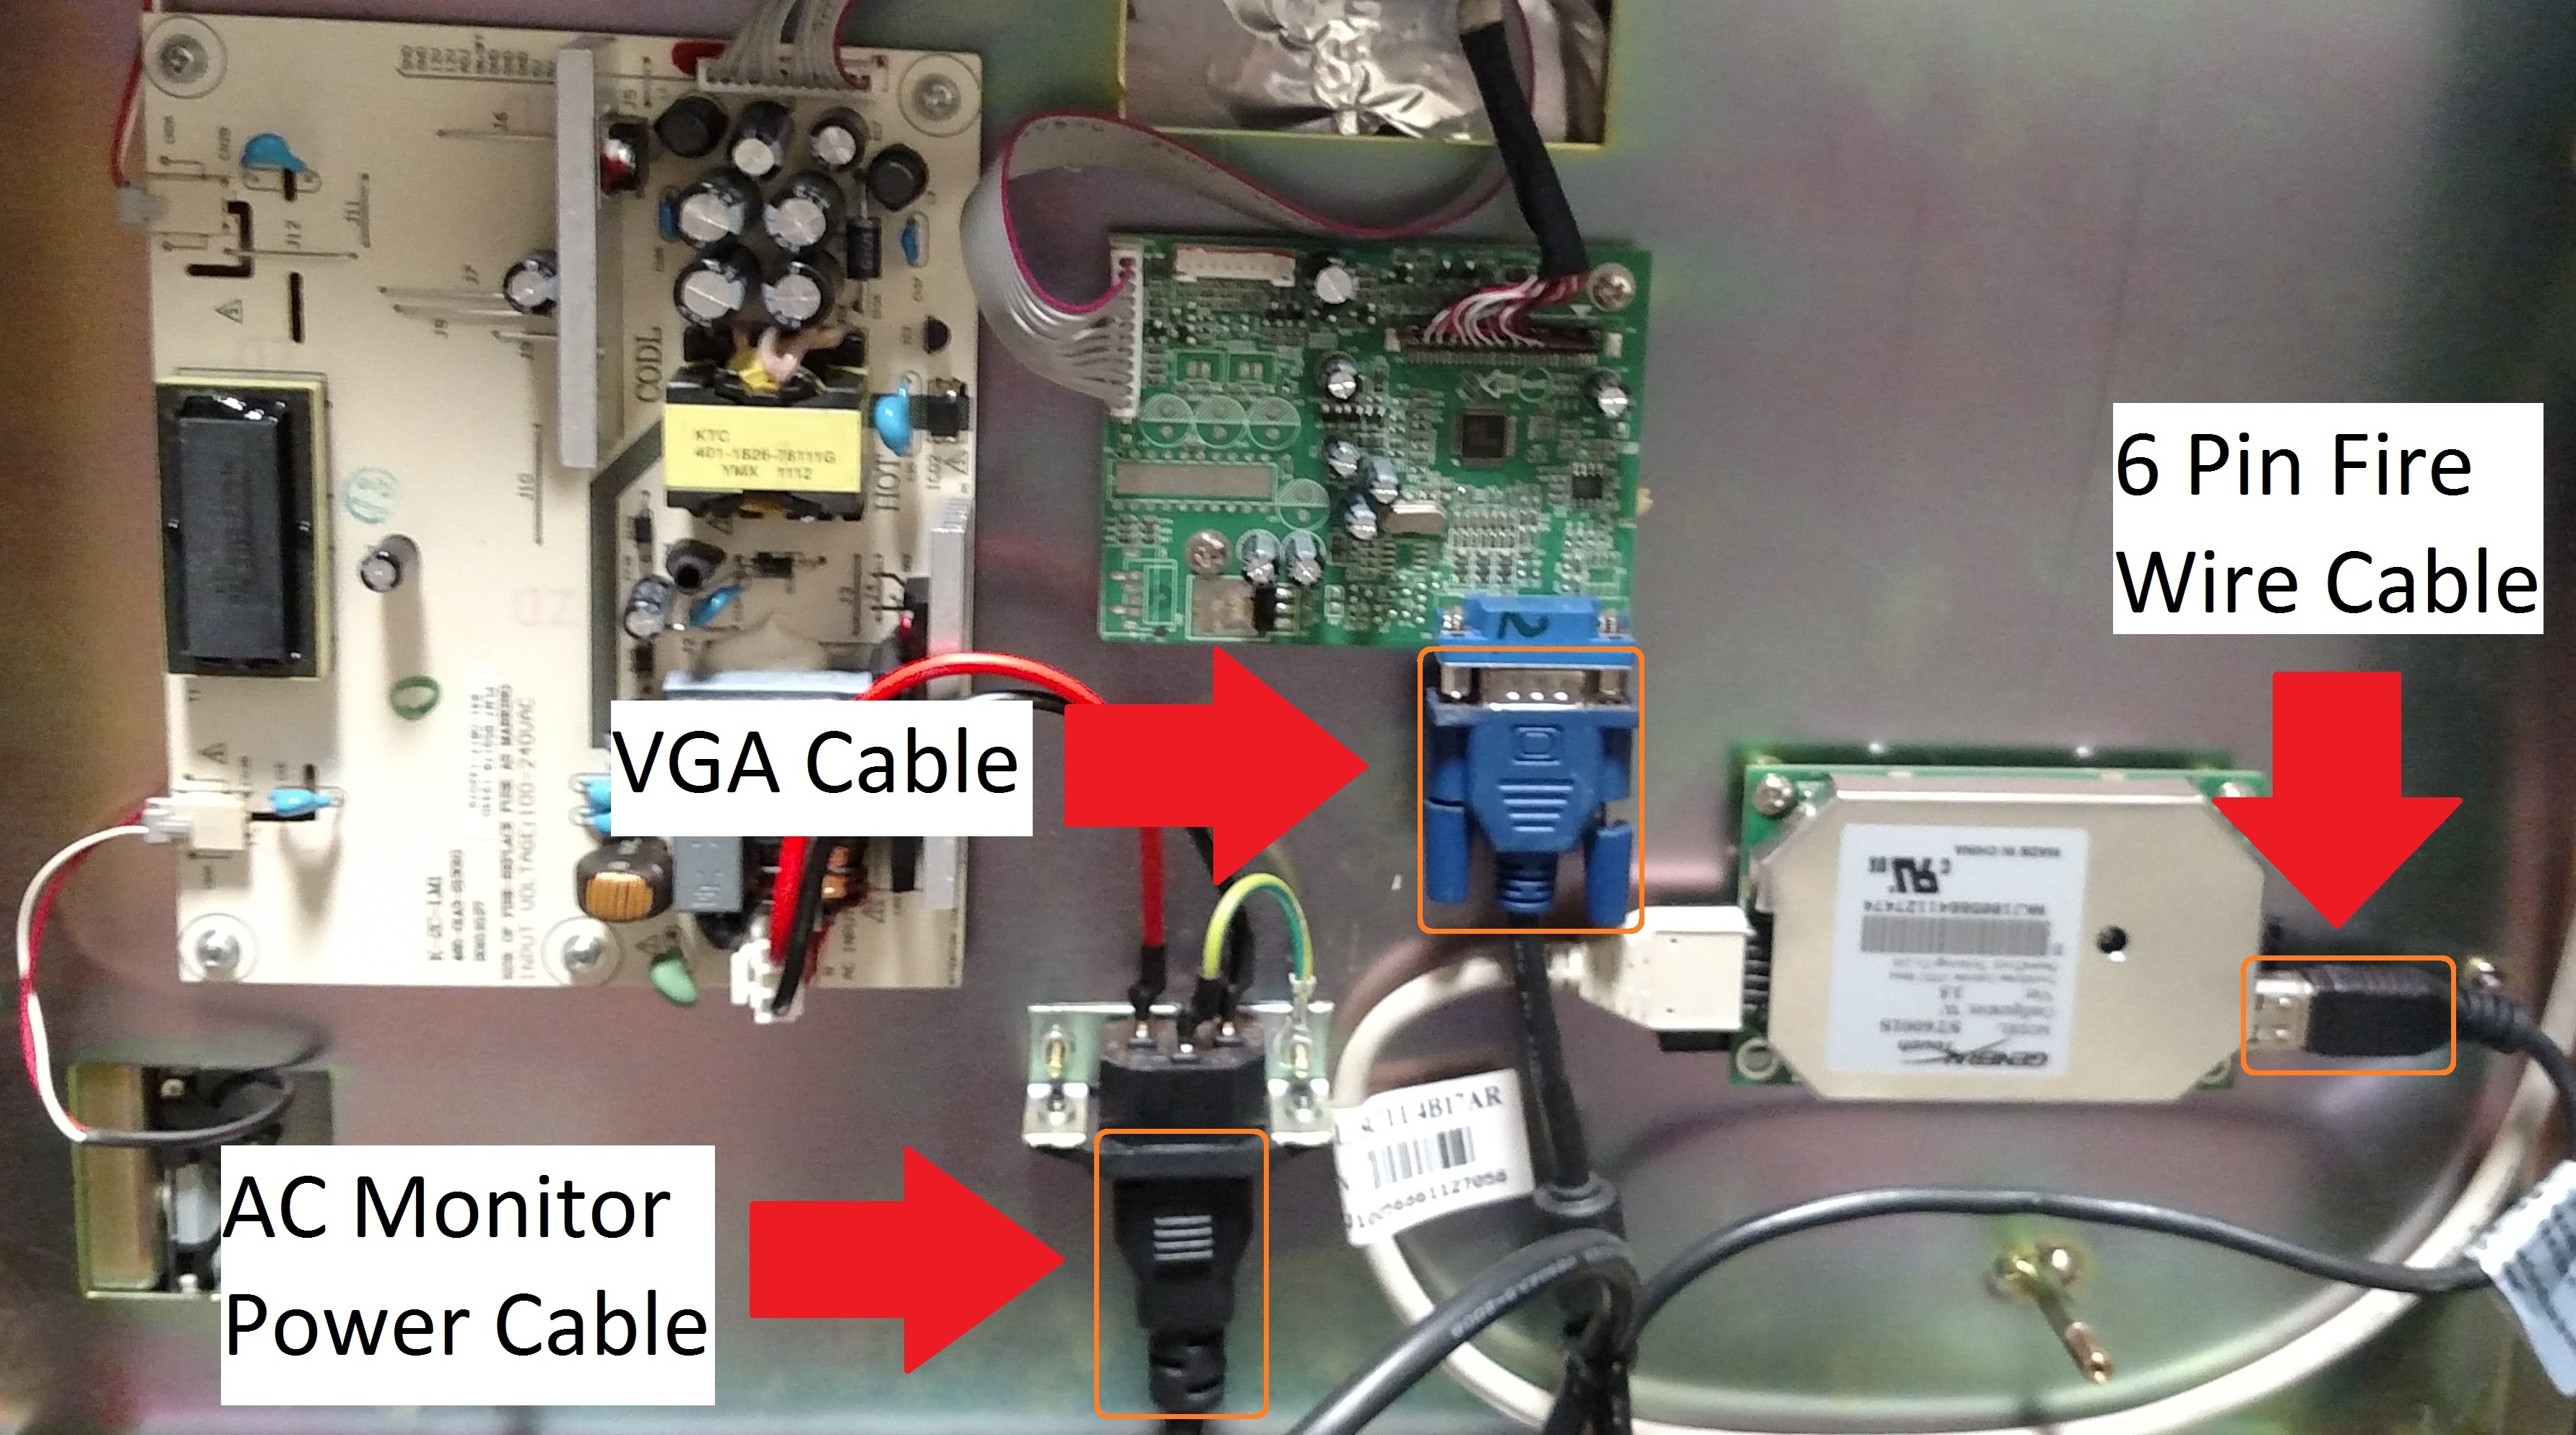
STEP 7: Disconnect the AC Monitor Power Cable then the Blue VGA Cable then the 6 Pin Fire Wire Cable (highlighted orange below).
STEP 8: Remove the 4 Philips screws and washers from both sides to remove the defective monitor. Below shows where the 2 Philip screws (highlighted red) are located on one of the sides.
STEP 9: Install replacement monitor by inserting the 4 screws and washers. Do NOT tighten yet.
STEP 10: Push monitor flush with print station face place then tighten the 4 screws. Warning: Do NOT apply too much pressure. If monitor is too tight to print station face plate, touchscreen could malfunction.
STEP 11: Follow STEP 7 through STEP 3 in reverse order.